Video downloader
Содержание:
- Check if JDownloader is running
- Plain CNL2
- Review
- Conceptual Ideas
- Docker Image Update
- Jdownloader. Качай почти всё.
- User/Group IDs
- How can I upload(commit,write) my changes?
- User experience
- Configuration
- Installation
- How to Download and Install JDownloader 2 for Free
- YouTube Converter 2.9.1.0 + Portable [2011, Менеджер загрузок, конвертер]
- Полное описание
- MyJDownloader
- Appendixes
Check if JDownloader is running
CNL2 requires that JDownloader is running.
- If A “Website” with ‘JDownloader’ opens, JD is running.
If this does not work,
- JD is not running
- ExternInterface/Flashgot Extension in JD is disabled
- Addons like NOscript ABE block the request
Check JD with Javascript
With this simple Javascript, you can check and display if JDownloader is running:
<script language="javascript">
   var jdownloader=false;
</script>
<script language="javascript" src="http://127.0.0.1:9666/jdcheck.js"></script>
<script language="javascript">
   if(jdownloader){
      document.write("(JDownloader is currently running)");
   }else{
      document.write("(JDownloader is NOT running)");
   }
</script>
Example
Post Links to JDownloader
This can be done with a simple HTML POST Form:
<html>
<FORM ACTION="http://127.0.0.1:9666/flash/addcrypted2" target="hidden" METHOD="POST">
   <INPUT TYPE="hidden" NAME="passwords" VALUE="myPassword">
   <INPUT TYPE="hidden" NAME="source" VALUE="http://jdownloader.org/spielwiese">
   <INPUT TYPE="hidden" NAME="jk" VALUE="function f(){ return '31323334353637383930393837363534';}">
   <INPUT TYPE="hidden" NAME="crypted" VALUE="DRurBGEf2ntP7Z0WDkMP8e1ZeK7PswJGeBHCg4zEYXZSE3Qqxsbi5EF1KosgkKQ9SL8qOOUAI+eDPFypAtQS9A==">
   <INPUT TYPE="SUBMIT" NAME="submit" VALUE="Add Link to JDownloader">
</FORM>
Example
- passwords: enter the archive password here
- source: this is the referer. Enter the Sourceurl for the links. This url will be exported to DLC instead of the plain links
- jk: AES Key as Javascript funktion. the f function always has to return the correct key.
- crypted: The Crypted URL Text. See PhP section for encryption details.
PHP code
function base16Encode($arg){
	$ret="";
	for($i=0;$i<strlen($arg);$i++){
		$tmp=ord(substr($arg,$i,1));
		$ret.=dechex($tmp);
}
	return $ret;
}

$key="1234567890987654";
$transmitKey=base16Encode($key);
$link="http://rapidshare.com/files/285626259/jDownloader.dmg\r\nhttp://rapidshare.com/files/285622259/jDownloader2.dmg";
$cp = mcrypt_module_open(MCRYPT_RIJNDAEL_128, '', 'cbc', '');
@mcrypt_generic_init($cp, $key,$key);
$enc = mcrypt_generic($cp, $link);
mcrypt_generic_deinit($cp);
mcrypt_module_close($cp);
$crypted=base64_encode($enc);

echo $crypted;
Plain CNL2
A very bsic, but insecure version of CNL2 is PLain CNL. You Do not need any serverside encryption here.
<FORM ACTION="http://127.0.0.1:9666/flash/add" target="hidden" METHOD="POST">
  INPUT TYPE="hidden" NAME="passwords" VALUE="myPassword">
   <INPUT TYPE="hidden" NAME="source" VALUE="http://jdownloader.org/spielwiese">
   <INPUT TYPE="hidden" NAME="urls" VALUE="http://www.rapidshare.com/files/407970280/RapidShareManager2WindowsSetup.exe">
   <INPUT TYPE="SUBMIT" NAME="submit" VALUE="Add Link to JDownloader">
</FORM>
You can pass multiple urls and passwords by seperating them with \r\n
Try it:
Review
JDownloader 2 is a download manager specialized in downloading from sites like rapidshare, netload.in, freakshare, depositfiles, etc.
On the Internet there are plenty of places where we can make direct downloads. When we say “direct download”, we mean that a file can be downloaded directly from the browser, without using any other type of additional software to make the download. The pages that offer “direct download” files tend to impose a series of limits to non-registered users, so maybe we must wait a few seconds, or validate a captcha, before download starts. To eliminate such restrictions we can buy a premium account on the downloads page, or we can use a specialized software.
JDownloader 2 allows us to download files from different file hosting pages. So if we want to download a file from rapidshare and other from freakshare, the only thing we have to do is copy the link and paste it in the program. In this way, we will always use the same interface to download files, regardless of the hosting file site.
It should be noted that the waiting times, and the captcha will continue to exist, but we’ll avoid to click on two or three links before download begins, because once the link is pasted in the program, and the download starts, the program will alert us when the countdown is finished and will display a window showing us the captcha.
If we have a premium account in any of the hosting file servers, we will be able to set it up in the program and make use of the advantages of premium account. The program supports almost all file hosting services, so we will not have problems in configuring the premium accounts. If we don’t have any premium account and we want to get it, we can do it directly from the program itself.
The “Link Grabber» built-in function facilitates greatly file download process. This option consists in that just copying one or several links to the clipboard (Ctrl+C), the links of files are automatically moved to the JDownloader 2 interface where we can start with the download. Is usual that in many web pages are multiple links to files on rapidshare, etc. If we download these files manually, we will have to click on each one of the links and be aware the countdown of each one of them, and to enter the captcha. With this program we only have to select the link with the mouse, press Control+C (copy), and press the button to Start Downloading. The program automatically handles countdown and show us the captcha. In this way we will be able to do any other tasks while the files are downloading.
The program can automatically uncompress downloaded files, so we don’t need to do this manually.
On certain download servers they limit number of downloads per hour from the same IP. We can reboot the router to get a new IP and avoid this limit. We can configure this program to automatically restart the router without our intervention.
If we are using one or several proxy, we can easily configure them in the menu “Manager Connections”.
In addition we will be able to download videos from different video portals like: YouTube, vimeo, justin.tv and more. Also we will be able to download music from: grooveshark, soundcloud, jamendo and more.
Some of the improvements that brings JDownloader 2 with respect to its previous version are: fastest start, creation of rules depending on the type of file that is being downloaded, captcha window can be resized, and more.
In summary, this program facilitates greatly the downloading of files from a multitude of different sites. The software is free, although it has the possibility of purchasing a premium account in which we will have certain advantages, such as: remote control through web and applications to control the program by using an Android, iPhone, and Windows Phone.
Conceptual Ideas
The idea about the terminal implementation is that on any computer (Windows, Linux, Linux server edition, Unix,…) the application can be ran the old-skool way, using command line aka terminals. The ideas explained on this page are only conceptual ideas so far. Implentation hasn’t started yet on this topic and even if it was those conceptual ideas stay conceptual.
Running JD
Full terminal support
The application can be started from commandline with some parameter, eg .
JD gets control over the entire terminal to use every line that is visible to the user to display continuous status information. This information gets updated every x miliseconds.
Ghost support
A second way to start JD is to use some kind of ghost option (). This way the application is started from the command line but no graphical interface is shown nor a terminal interface. Altough the application can still be controlled as described in the “Controlling JD” part beneath.
Logging and terminal output
Logging should not be done in the terminal but all loging should just be written to a file. For the output in terminal window system.out.println or something simular can be used! To change the logging it’s good have a look at the JDLogger.getLogger() method.
First opinion on this is that the JDLogger class should be extended to use a TerminalLogger and FileLogger or something like that. When JD is started in terminal mode, only the FileLogger will be used. When JD is started in normal GUI mode both loggers are used ( would become ).
Watchfolders
One or more watchfolders can be defined in which container files can be dropped and automatically picked up by JD. The handling of the container files is already present, the watchfolder functionallity is probably still to be implemented.
Controlling JD
Main controlling
The running instance of JD can be controlled using a second terminal window in which pre-defined commands can be entered using the same executable as used to start the application. Eg:
- …
Reporting
Other options such as some kind of reporting can also be integrated here. For instance:
According to coalado the “start binary and pass parameter to running instance” thingy already works. So nog big deal on this one. It should only be extended with more parameters to be used! This will probably be at least 20 parameters.
Configuring JD
JD has a lot of configuration options and we do not want the user to mess around in configuration files etc so an entire terminal configuration interface will be implemented. This interface can be started with the command . All non-gui related options of JD will be available through this interface so the user can easily edit the values of it.
For this gui-less implementation no internationalization will be implemented at first. If needed internationalization can always be done afterwards!
Docker Image Update
Because features are added, issues are fixed, or simply because a new version
of the containerized application is integrated, the Docker image is regularly
updated. Different methods can be used to update the Docker image.
The system used to run the container may have a built-in way to update
containers. If so, this could be your primary way to update Docker images.
An other way is to have the image be automatically updated with Watchtower.
Watchtower is a container-based solution for automating Docker image updates.
This is a «set and forget» type of solution: once a new image is available,
Watchtower will seamlessly perform the necessary steps to update the container.
Finally, the Docker image can be manually updated with these steps:
- Fetch the latest image:
- Stop the container:
- Remove the container:
- Create and start the container using the command, with the
the same parameters that were used when it was deployed initially.
Synology
For owners of a Synology NAS, the following steps can be used to update a
container image.
- Open the Docker application.
- Click on Registry in the left pane.
- In the search bar, type the name of the container ().
- Select the image, click Download and then choose the tag.
- Wait for the download to complete. A notification will appear once done.
- Click on Container in the left pane.
- Select your JDownloader 2 container.
- Stop it by clicking Action->Stop.
- Clear the container by clicking Action->Reset (or Action->Clear if
you don’t have the latest Docker application). This removes the
container while keeping its configuration. - Start the container again by clicking Action->Start. NOTE: The
container may temporarily disappear from the list while it is re-created.
unRAID
For unRAID, a container image can be updated by following these steps:
- Select the Docker tab.
- Click the Check for Updates button at the bottom of the page.
- Click the update ready link of the container to be updated.
Jdownloader. Качай почти всё.
Скачать можно на официальном сайте — jdownloader.org .
Платформы: Windows, MacOS, Linux.
Имеется русский интерфейс, переведены самые основные моменты, но есть места где всё на английском.
На самом деле, эту программу можно назваться настоящим комбайном в среде загрузок.
С помощью её вы сможете:
- Скачать видео с ютуб, вк, rutube, vimeo и многих других видео хостингов.
- Скачать все фото с инсты (истории к сожалению не качает).
- Музыку или подкасты с soundcloud
- Собрать фото с альбомов ВК.
- И многое другое.
Из минусов, не удаётся скачать кино с сайтов. На большинстве сайтов с кино, фильмы можно скачать при помощи Internet Download Manager, но правда в формате ts, но этот формат вполне хорошо воспроизводится при помощи Media Player.
В остальном это довольно мощный граббер, который периодически обновляется.
Пример работы с программой Jdownloader.
Если у вас активна опция «Включить или выключить наблюдение за буфером обмена» то достаточно скопировать ссылку на сайт, например ссылку на видео.

Затем на вкладке «Захват ссылок» вы увидите возможность скачать видео. Необходимо раскрыть папку и выбрать качество скачиваемого видео. (видео второе по списку, первое это скачать только звук из видео).

- Нажимаете правой кнопкой мышки на нужный файл и выбираете «Начать скачивать». При скачивании видео программа может потребовать дополнительные кодеки, но сама их предложит установить, вам не придётся искать их и устанавливать самостоятельно.
- Далее в разделе» закачки» вы можете просто наблюдать за процессом скачивания.
Если опция «Включить или выключить наблюдение за буфером обмена» не активна. (чтобы при копировании каждой ссылки программа не стала проверять ссылку на возможность скачать файлы).
- Нажимаете внизу программы кнопку «Добавить новые ссылки».
- Вводите ссылку или несколько ссылок, по одной ссылке на строчку
А дальше, так же в разделе «Захват ссылок» вы увидите папки, с файлами которые удалось найти по ссылкам. Остаётся приступить к скачиванию.
Чтобы скачать все фото с инсты, можно просто добавить в программу ссылку на профиль в инстаграм, затем выбрать скачивание папки.
Файлы по умолчанию сохраняются в ваши документы.
При разрыве скачивания, программа может через некоторое время сама возобновить процесс если это возможно.
Остальные возможности софта.
Распаковщик архивов.
В инструментах программы обнаружил распаковщик архивов. Найти его можно вверху в пункте «Инструменты» «Распаковать файлы».
C Zip и Rar справился на ура, насчёт остальных форматов ничего сказать не могу.
Использование прокси.
В настройках, раздел «Менеджер соединения» вы можете назначить прокси. Если по какой то причине сайт банится вашим провайдером, программа может попытаться качать через прокси.
В прочем как моё мнение, проще использовать VPN.
Антикапча.
Имеется функционал распознавания капчи для сайтов где это необходимо.
Находится раздел тоже в настройках, «Captchas».
Заключение.
В целом, наверное лучший бесплатный загрузчик файлов из интернета.
User/Group IDs
When using data volumes ( flags), permissions issues can occur between the
host and the container. For example, the user within the container may not
exist on the host. This could prevent the host from properly accessing files
and folders on the shared volume.
To avoid any problem, you can specify the user the application should run as.
This is done by passing the user ID and group ID to the container via the
and environment variables.
To find the right IDs to use, issue the following command on the host, with the
user owning the data volume on the host:
Which gives an output like this one:
The value of (user ID) and (group ID) are the ones that you should
be given the container.
How can I upload(commit,write) my changes?
To upload to your code server, you need write access. Basically, everybody can get write access. But there are some requirements:
- Don’t be evil
- JDownloader currently is GPL, but soon will change it’s license to a different Open Source/Commercial Duallicense.
- Username (Your code will be published under this name)
- Allowance to relicense your commits. Example:
Herby I allow AppWork GmbH, Schwabacher Straße 117, 90763 Fürth, to re-license my (as user ‘<YOUR USERNAME>’) commits to the JDownloader Code Server (svn.jdownloader.org). Re-licensing, in this case, means modifying and distributing my changes under a new license.
User experience
At first glance, JDownloader 2 may look a bit overwhelming to a new user, but the truth is, it’s really an easy program to master.

The entire download process is automated. All you need to do is add the link, and the software will handle everything else. You can pause and resume downloads without losing your progress or corrupting the file, even when the hosting platform doesn’t support pause and resume functions.
To keep things easy, JDdownloader 2 will automatically save a URL that you copy (using CTRL+C) and then automatically paste it to the program so it can analyze the page and find all the downloadable files. This is a huge time saver, as you can paste a lot of links and then download the entire batch at once.
JDownloader 2 Features
- Pause Downloads: While many download hosts don’t allow the download manager to pause, JDownloader 2 has found a solution. It slows down the download speed to almost zero, which essentially pauses it without actually pausing it, so you can enjoy your full bandwidth while using the computer. When you’re ready, you can resume the download, and it will return to its regular speed.
- Cross Platform: JDownloader 2 is developed using Java, which means it can be used with most platforms, including Windows, Mac, and Linux.
- Automatically unzips files: It can recognize a download file that is compressed in a ZIP file and automatically unzip it.
- Link Grabber: Quickly download videos from social media sites by pasting the URL in the Link Grabber tab, and JDownloader 2 will inspect that link, list the available files, and you can select which ones you want to download.
- Set priorities: Rank the download links by order of importance so that the files you need or want quickly will download first, regardless of the order you added it to the queue.
Configuration
You can set many parameters when you configure this container, but you must specify your MyJDownloader login/password to connect to your container.
Configuration values
| Parameter | Function |
|---|---|
| Config file folder, saves your configuration on the host | |
| Container logs folder, specify it only if you wan to keep logs on the host | |
| Downloads folder (where you put your mountpoint) | |
| This Network port is required for Direct Connection mode, more information in |
Environment Variables
| Parameter | Function |
|---|---|
| Your MyJDownloader user | |
| Your MyJDownloader password | |
| The device name that will appear on MyJdownloader portal | |
| If you use this variable, set it as per the downloads folder volume! | |
Identify
If haven’t set MYJD_USER and MYJD_PASSWORD values, you can still configure an account by running (Recommended method)
Installation
Here are some examples to get started with the creation of this container.
services:
   jdownloader:
    image: jaymoulin/jdownloader
    container_name: jdownloader
    restart: always
    user: 1001:100
    volumes:
        - </path/to/appdata/config>:/opt/JDownloader/cfg
        - </path/to/downloads>:/opt/JDownloader/Downloads
        - </path/to/appdata/logs>:/opt/JDownloader/logs #optional
        - /etc/localtime:/etc/localtime:ro #optional
    environment:
            MYJD_USER: email@email.com #optional (see (https://github.com/jaymoulin/docker-jdownloader#identify))
            MYJD_PASSWORD: bar #optional (see (https://github.com/jaymoulin/docker-jdownloader#identify))
            MYJD_DEVICE_NAME: goofy #optional
            XDG_DOWNLOAD_DIR: /opt/JDownloader/Downloads #optional
    ports:
        - 3129:3129
Note for RPI Zero : specify that you want the arm32v6 image (e.g. jaymoulin/jdownloader:0.7.0-arm32v6) because rpi zero identify itself as armhf which is wrong.
How to Download and Install JDownloader 2 for Free
- Click on the Download button on the sidebar, and the JDownloader 2 download page will open in a new tab.
- Click on the logo for your operating system, and a download link will appear.
- Press the link, and a new page will open to an external download site. Click on the Download link. The file is stored as a compressed RAR file, so you will need a program like WinRAR or WinZip to extract the setup wizard.
- When the setup wizard opens, click Next to begin the installation.
- Select the destination folder or use the default one chosen by JDownloader 2, and click Next.
- Choose which file associations should be created, or just use the four default options, and click Next.
- If you want a desktop icon, mark the appropriate box, and click Next.
- JDownloader 2 has some ads in the installation wizard. I saw one for the Opera Browser and another for Avast Antivirus. If you don’t want to download these extra programs, you will have to decline the offer before clicking the Next button.
- JDownloader 2 will install on your computer.
- When the installation is complete, press the Finish button.
How to Uninstall JDownloader 2
If JDownloader 2 isn’t the right download program for you, . In the meantime, you can remove the program from your computer by following these simple steps.
- Type Add or Remove Programs in the Windows search bar and press the Enter key.
- Find JDownloader 2 in the list of programs, and click Uninstall.
- Confirm that you want to delete JDownloader 2, and the uninstallation wizard will remove it from your computer.
YouTube Converter 2.9.1.0 + Portable [2011, Менеджер загрузок, конвертер]
Год выпуска: 2011Жанр: Менеджер загрузок, конвертерРазработчик: Aneesoft SoftwareСайт разработчика: http://www.aneesoft.comЯзык интерфейса: АнглийскийПлатформа: Windows XP, Vista, 7 Системные требования: 512MB RAM (1G or above recommended) 20MB space for installation Super VGA (1024×768) resolution, 32-bit graphics card or higher 2.4GHz Intel/AMD processor or above YouTube Converter Aneesoft — один из лучших загрузчиков с YouTube и YouTube преобразователь на Windows PC. Программа позволяет загружать несколько видеофайлов с YouTube одновременно. Просто скопируйте ссылку с YouTube д …
Программы / Интернет и сети / Браузеры, Менеджеры загрузки
Подробнее
Полное описание
Video Downloader представляет собой набор удобных и надёжных утилит для скачивания, конвертации и просмотра мультимедийных файлов из различных соцсетей и видеохостингов. В процессе установки программного обеспечения вам будет предложено, какие инструменты вы хотите добавить, а также с какими расширениями файлов желаете ассоциировать софт.
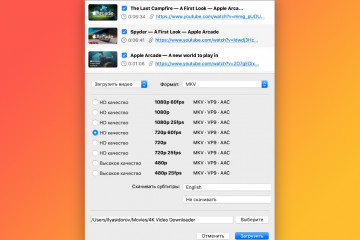
Несмотря на англоязычную локализацию, загрузчик обладает приятным и интуитивно понятным интерфейсом. Чтобы загрузить желаемый видеоролик в память ПК, необходимо скопировать URL адрес интересующего вас клипа в буфер обмена, вставить его в адресную строку в окне приложения и нажать кнопку Download, расположенную в нижней части экрана. Поддерживаются все популярные браузеры Google Chrome, Opera, Mozilla Firefox, Microsoft Edge, Safari, Internet Explorer и так далее.
Автоматическое сохранение файлов производится в предварительно указанную папку на жёстком диске. Перед началом онлайн закачки можно выбирать разрешение сохраняемого видеофайла, от 240p/360p и 720p до Full HD и даже 8K. Здесь уже всё зависит от того, в каком качестве ролик доступен на самом видео-сервисе. Процедура загрузки стартует в фоновом режиме, её статус будет отображаться из системного трея.
Отдельного внимания заслуживает встроенный конвертер, позволяющий преобразовывать обилие форматов, включая AVI, 3GP, MOV, MP4, FLV, WMV, MKV, MPG, Flash, ASF, VOB, TS, WEBM и многие другие. Вы сможете сконвертировать любой видеоролик, к примеру, для последующего просмотра на большом экране телевизора или с мобильного устройства Android, iPhone, iPad. Можно извлекать аудиодорожку из видео, а затем точно так же конвертировать и сохранять их в нужном формате. Отличный плеер поможет сразу воспроизводить загруженную вами музыку и видео. Любимые клипы и звуковые дорожки можно добавить в собственные плейлисты.
Простая утилита совместима со всеми версиями ОС Windows от XP и выше. Есть версии для MacOS и Linux. К сожалению, пробный период ограничен десятью днями использования, далее для загрузки и воспроизведения роликов потребуется регистрация и приобретение лицензии Video Downloader Professional.
MyJDownloader
To activate, open the JDownloader UI and click the My.JDownloader tab.
Direct Connection
When using MyJDownloader from a device on the same local network as the
JDownloader Docker container instance, Direct Connection mode can be enabled
to reduce the latency and increase the bandwidth. With this mode, instead of
going through the cloud, the communication is done through a direct connection
between the device and JDownloader.
The default container’s network being in bridge mode, the Direct Connection
mode is not automatically detected/activated and the following steps are required:
- Make sure the container’s port is mapped to the host port .
This is done by adding the parameter to the
command. - Open the JDownloader UI.
- Go to Settings->Advanced Settings.
- Search for .
- Set to the IP address of the host running the container,
between double quotes (e.g. ). - Change the to .
- Restart JDownloader (File->Restart).
Appendixes
Direct Connection Mode
Direct Connection mode (or Direct Connections) improves the use of this container via MyJDownloader GUI and is strongly recommended at least in your LAN.
By enabling this mode, the communication happens directly between the client and the JDownloader server via port 3129 (by default), instead of being routed trough MyJDownloader servers. This enables the GUI to respond much faster with information reliably updating over time.
In this mode, MyJDownloader server still handles service related tasks, like the session authentication and notifications.
DNS Rebind Warning
If you are running a router like Fritz!Box, Asus, OpenWRT, DDWRT, pfSense or any other 3rd party advanced routers you may have DNS Rebind Protection enabled: Direct Connections will not work, you will have to explicitly whitelist . The procedure is different for every router, here are some tips:
- Asus Merlin: Follow this procedure to enable custom scripts and edit the dnsmasq file, then add the line
- OpenWRT: browse to Network>DHCP and DNS>General Settings and add to Domain Whitelist
- pfSense: more information
Direct Connection using a Bridged Network
To get Direct Connection when using a bridged newtwork, please follow these steps:
- Expose 3129 port when creating the container ( parameter)
- When JDownloader is running, navigate to Settings > Advanced Settings > Search for «myjdownloader» > Find MyJDownloaderSettings: Custom Device IPs and enter your host LAN IP using this formatting . If you need to specify more IPs use
- Set MyJDownloaderSettings: Manual Local Port to
- Set MyJDownloaderSettings: Direct Connect Mode to
- Restart JDownloader, connections will now be direct
Debugging
You can put a file called file in your Download folder to pause the container start.
This will allow to connect to the container with a shell to debug. ()
If you don’t have Docker installed yet, you can do it easily in one line using this command