A beginner’s guide to install gcc and g++ compiler on windows 10
Содержание:
- Set up your Linux environment
- Introduction: How to Install MinGW GCC/G++ Compiler in Windows XP/7/8/8.1/10
- 3- Installing MSYS2 on your PC
- Build helloworld.cpp
- Step through the code
- 4- Installing GCC and other development tools with the pacman package management system
- 2- The principle
- Debug helloworld.cpp
- Caveats
- Debug helloworld.cpp
- C/C++ configurations
- Install C on MAC
- Add a source code file
- Step through the code
- Step 5: It’s DONE!!
- Introduction
- Create Hello World
Set up your Linux environment
-
Open the Bash shell for WSL. If you installed an Ubuntu distro, type «Ubuntu» in the Windows search box and then click on it in the result list. For Debian, type «Debian», and so on.
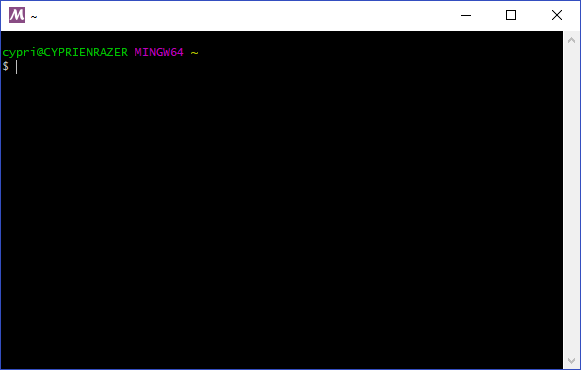
The shell appears with a command prompt that by default consists of your user name and computer name, and puts you in your home directory. For Ubuntu it looks like this:
-
Make a directory called and then subdirectory under that called :
-
Although you will be using VS Code to edit your source code, you’ll be compiling the source code on Linux using the g++ compiler. You’ll also debug on Linux using GDB. These tools are not installed by default on Ubuntu, so you have to install them. Fortunately, that task is quite easy!
-
From the WSL command prompt, first run to update the Ubuntu package lists. An out-of-date distro can sometimes interfere with attempts to install new packages.
If you like, you can run to also download the latest versions of the system packages, but this can take significantly longer depending on your connection speed.
-
From the command prompt, install the GNU compiler tools and the GDB debugger by typing:
-
Verify that the install succeeded by locating g++ and gdb. If the filenames are not returned from the command, try running the update command again.
Introduction: How to Install MinGW GCC/G++ Compiler in Windows XP/7/8/8.1/10
By Being EngineersVisit our Youtube channelFollow
More by the author:
About: We run YouTube channel and provide some video tutorials on electronics and programming and also videos on cool projects — how to make them, tech news and more. Subscribe to our channel. 🙂
More About Being Engineers »
Gcc and G++ are one of the best compilers for C and C++ in all platform. It’s is lite, easy to use, and simple. But the packages and installation is not that simple. But it’s clear and easy if you proceed one step at a time and do whatever is said in this tutorial. All screenshots are given. Do look at those if you are finding any steps difficult to complete.
You can also watch this video that I made to get things work quickly. Same exact steps are shown there in the video —
If you are using windows 10 then there might be some problem executing the program. I will tell you the solution at the required step. So without making further delay let’s start this tutorial.
3- Installing MSYS2 on your PC
What is MSYS2?
According to their website, MSYS2 is a software distribution and building platform for Windows
The Website: https://www.msys2.org/
Installing it is actually a peace of cake
Just download the correct installer and launch it with admin rights and you are good to go

Expected something more complex?
Sorry about that
Once you installed it, you will see 3 programs appear in your list of programs:
- MSYS2 MinGW 32-bit
- MSYS2 MinGW 64-bit
- MSYS2 MSYS
Run the 3rd one MSYS2 MSYS to open a special command window in which you can input commands and start to install programs
The package management system which is equivalent to apt-get on linux is called pacman
When you install MSYS2 for the first time, you have to update pacman using the following command:
pacman -Syu
Build helloworld.cpp
Next, you’ll create a file to tell VS Code how to build (compile) the program. This task will invoke the g++ compiler to create an executable file based on the source code.
From the main menu, choose Terminal > Configure Default Build Task. In the dropdown, which will display a tasks dropdown listing various predefined build tasks for C++ compilers. Choose g++.exe build active file, which will build the file that is currently displayed (active) in the editor.

This will create a file in a folder and open it in the editor.
Your new file should look similar to the JSON below:
The setting specifies the program to run; in this case that is g++. The array specifies the command-line arguments that will be passed to g++. These arguments must be specified in the order expected by the compiler. This task tells g++ to take the active file (), compile it, and create an executable file in the current directory () with the same name as the active file but with the extension (), resulting in for our example.
The value is what you will see in the tasks list; you can name this whatever you like.
The value in the object specifies that this task will be run when you press ⇧⌘B (Windows, Linux Ctrl+Shift+B). This property is for convenience only; if you set it to false, you can still run it from the Terminal menu with Tasks: Run Build Task.
Running the build
-
Go back to . Your task builds the active file and you want to build .
-
To run the build task defined in , press ⇧⌘B (Windows, Linux Ctrl+Shift+B) or from the Terminal main menu choose Run Build Task.
-
When the task starts, you should see the Integrated Terminal panel appear below the source code editor. After the task completes, the terminal shows output from the compiler that indicates whether the build succeeded or failed. For a successful g++ build, the output looks something like this:
-
Create a new terminal using the + button and you’ll have a new terminal with the folder as the working directory. Run and you should now see the executable .
-
You can run in the terminal by typing (or if you use a PowerShell terminal).
Modifying tasks.json
You can modify your to build multiple C++ files by using an argument like instead of . This will build all files in your current folder. You can also modify the output filename by replacing with a hard-coded filename (for example ).
Step through the code
Now you’re ready to start stepping through the code.
-
Click or press the Step over icon in the debugging control panel.
This will advance program execution to the first line of the for loop, and skip over all the internal function calls within the and classes that are invoked when the variable is created and initialized. Notice the change in the Variables window on the left.
In this case, the errors are expected because, although the variable names for the loop are now visible to the debugger, the statement has not executed yet, so there is nothing to read at this point. The contents of are visible, however, because that statement has completed.
-
Press Step over again to advance to the next statement in this program (skipping over all the internal code that is executed to initialize the loop). Now, the Variables window shows information about the loop variables.
-
Press Step over again to execute the statement. (Note that as of the March 2019 release, the C++ extension does not print any output to the Debug Console until the loop exits.)
-
If you like, you can keep pressing Step over until all the words in the vector have been printed to the console. But if you are curious, try pressing the Step Into button to step through source code in the C++ standard library!
To return to your own code, one way is to keep pressing Step over. Another way is to set a breakpoint in your code by switching to the tab in the code editor, putting the insertion point somewhere on the statement inside the loop, and pressing F9. A red dot appears in the gutter on the left to indicate that a breakpoint has been set on this line.
Then press F5 to start execution from the current line in the standard library header. Execution will break on . If you like, you can press F9 again to toggle off the breakpoint.
When the loop has completed, you can see the output in the Debug Console tab of the integrated terminal, along with some other diagnostic information that is output by GDB.
4- Installing GCC and other development tools with the pacman package management system
Then you can start to install gcc and other developer tools using pacman like this:
# Install make, autoconf, etc to C:\msys64\usr\bin
pacman -S base-devel gcc vim cmake
This command will install first a set of development software included in a package called base-devel and then it will install gcc, vim and cmake
vim is optional, but always good to have 😉
(You can also install emacs very easily in the same way)
In the package base-devel, you have 53 useful developement tools that can be installed:
# pacman -S base-devel
   1) asciidoc  2) autoconf  3) autoconf2.13  4) autogen  5) automake-wrapper
   6) automake1.10  7) automake1.11  8) automake1.12  9) automake1.13
   10) automake1.14  11) automake1.15  12) automake1.16  13) automake1.6
   14) automake1.7  15) automake1.8  16) automake1.9  17) bison  18) diffstat
   19) diffutils  20) dos2unix  21) file  22) flex  23) gawk  24) gdb
   25) gettext  26) gettext-devel  27) gperf  28) grep  29) groff  30) help2man
   31) intltool  32) lemon  33) libtool  34) libunrar  35) libunrar-devel
   36) m4  37) make  38) man-db  39) pacman  40) pactoys-git  41) patch
   42) patchutils  43) perl  44) pkg-config  45) pkgfile  46) quilt  47) rcs
   48) scons  49) sed  50) swig  51) texinfo  52) texinfo-tex  53) ttyrec

# pacman -S gcc
   binutils-2.30-1  isl-0.19-1  mpc-1.1.0-1
   msys2-runtime-devel-2.11.1-2
   msys2-w32api-headers-6.0.0.5223.7f9d8753-1
   msys2-w32api-runtime-6.0.0.5223.7f9d8753-1
   windows-default-manifest-6.4-1  gcc-7.3.0-3
2- The principle
Now that you understand how it can be easy to start with writing C code, let’s talk about the difficult part…
How to actually install gcc on Windows…
The reason it is easy to install compilers and other kind of open source software on linux is because you have a very powerful command line terminal called bash which handles the installation, uninstallation and upgrade of software using a software called “apt” on debian-based linux systems.
On Windows, if you want to have gcc (and the other compilers too), you have to download the source code and find a way to compile it…
For that, you will need to install first other software called pre-requisites which will also need to be compiled, etc…
You can spend several days trying to do that if you are really motivated
I will present you another way much simplier!
For that I will have to install a software called MSYS2, which is an “easy” way to give some linux feel to your Windows PC and able it to install programs almost as easily as in linux…
You will be able to install gcc just with one command line like this:

Excited?
Let’s go
Debug helloworld.cpp
Next, you’ll create a file to configure VS Code to launch the Microsoft C++ debugger when you press F5 to debug the program. From the main menu, choose Run > Add Configuration… and then choose C++ (Windows).
You’ll then see a dropdown for various predefined debugging configurations. Choose cl.exe build and debug active file.

VS Code creates a file, opens it in the editor, and builds and runs ‘helloworld’.
The setting specifies the program you want to debug. Here it is set to the active file folder and active filename with the extension , which if is the active file will be .
By default, the C++ extension won’t add any breakpoints to your source code and the value is set to . Change the value to to cause the debugger to stop on the method when you start debugging.
Start a debugging session
- Go back to so that it is the active file.
- Press F5 or from the main menu choose Run > Start Debugging. Before you start stepping through the source code, let’s take a moment to notice several changes in the user interface:
-
The Integrated Terminal appears at the bottom of the source code editor. In the Debug Output tab, you see output that indicates the debugger is up and running.
-
The editor highlights the first statement in the method. This is a breakpoint that the C++ extension automatically sets for you:
-
The Run view on the left shows debugging information. You’ll see an example later in the tutorial.
-
At the top of the code editor, a debugging control panel appears. You can move this around the screen by grabbing the dots on the left side.
Caveats
-
An ABI incompatibility between C++14 and C++17 has been fixed. On some
targets a class with a zero-sized subobject would be passed incorrectly
when compiled as C++17 or C++20.
See the for more details. -
The deprecated Profile Mode and extensions
have been removed from libstdc++. -
The non-standard type trait is deprecated
and will be removed from libstdc++ in a future release.
The standard trait should be instead. -
The minimum version of the MPFR
library required for building GCC has been increased to version
3.1.0 (released 2011-10-03). -
The automatic template instantiation at link time ()
has been removed. -
The internal parameter has
been removed in favor of a new official option
. While default behavior is
unchanged and the new option allows to correctly maintain a per
compilation unit setting across link-time optimization, alteration
of the default via will
now be diagnosed and build systems have to be adjusted accordingly. -
Offloading to Heterogeneous System Architecture Intermediate
Language (HSAIL) has been deprecated and will likely be removed in
a future release. -
The type of the base class of
was changed in C++98 mode
to be consistent with C++11 and later standards.
See the for more details.
Debug helloworld.cpp
Next, you’ll create a file to configure VS Code to launch the GDB debugger when you press F5 to debug the program.
- From the main menu, choose Run > Add Configuration… and then choose C++ (GDB/LLDB).
- You’ll then see a dropdown for various predefined debugging configurations. Choose g++.exe build and debug active file.

VS Code creates a file, opens it in the editor, and builds and runs ‘helloworld’.
The setting specifies the program you want to debug. Here it is set to the active file folder and active filename with the extension , which if is the active file will be .
By default, the C++ extension won’t add any breakpoints to your source code and the value is set to .
Change the value to to cause the debugger to stop on the method when you start debugging.
Start a debugging session
- Go back to so that it is the active file.
- Press F5 or from the main menu choose Run > Start Debugging. Before you start stepping through the source code, let’s take a moment to notice several changes in the user interface:
-
The Integrated Terminal appears at the bottom of the source code editor. In the Debug Output tab, you see output that indicates the debugger is up and running.
-
The editor highlights the first statement in the method. This is a breakpoint that the C++ extension automatically sets for you:
-
The Run view on the left shows debugging information. You’ll see an example later in the tutorial.
-
At the top of the code editor, a debugging control panel appears. You can move this around the screen by grabbing the dots on the left side.
C/C++ configurations
If you want more control over the C/C++ extension, you can create a file, which will allow you to change settings such as the path to the compiler, include paths, C++ standard (default is C++17), and more.
You can view the C/C++ configuration UI by running the command C/C++: Edit Configurations (UI) from the Command Palette (⇧⌘P (Windows, Linux Ctrl+Shift+P)).

This opens the C/C++ Configurations page. When you make changes here, VS Code writes them to a file called in the folder.
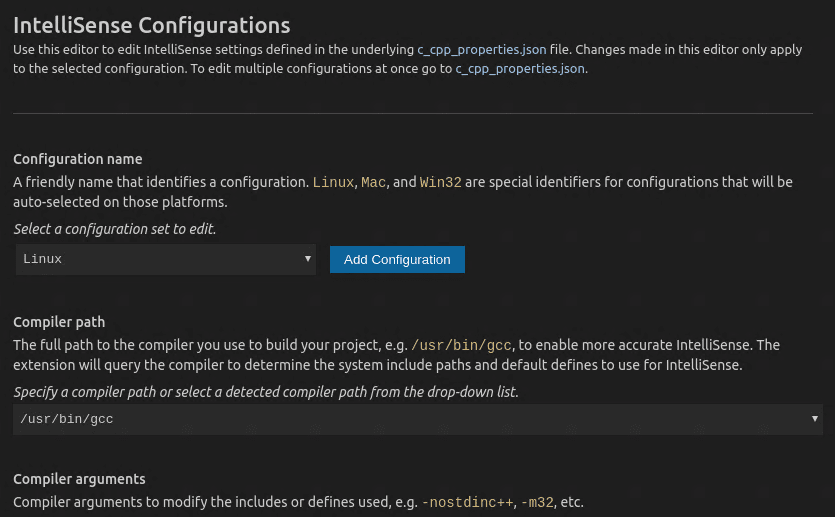
You only need to modify the Include path setting if your program includes header files that are not in your workspace or in the standard library path.
Visual Studio Code places these settings in . If you open that file directly, it should look something like this:
Install C on MAC
To set up a ‘C’ programming environment on MAC operating system, follow the given steps:
1. Visit the given link https://developer.apple.com/downloads/index.action and download. You will need an Apple developer ID
“Command Line Tools for X-Code,” pick any version (latest version is always recommended) and download the .dmg file.
2. After the file is being downloaded on the machine, double click and follow the wizard and install the file. Always keep the default settings as suggested by the installation wizard.
3. After the installation process, open a terminal and run gcc -v command to check if everything is successfully installed.
Add a source code file
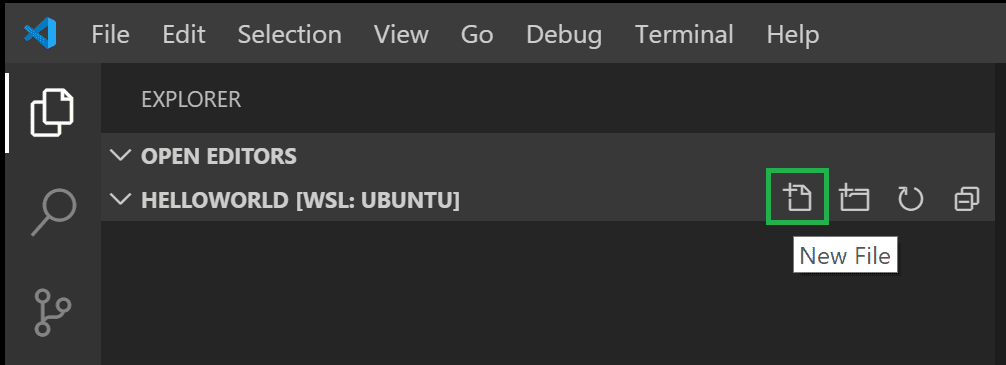
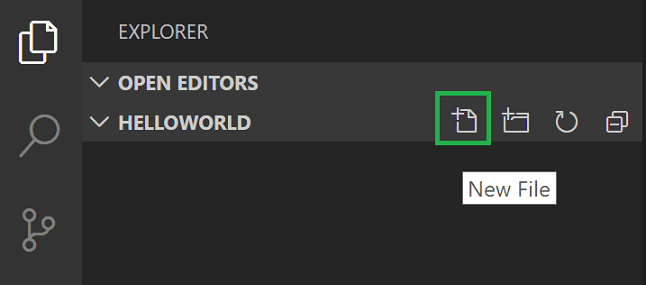
In the File Explorer title bar, select the New File button and name the file .
Install the C/C++ extension
Once you create the file and VS Code detects it is a C++ language file, you may be prompted to install the Microsoft C/C++ extension if you don’t already have it installed.
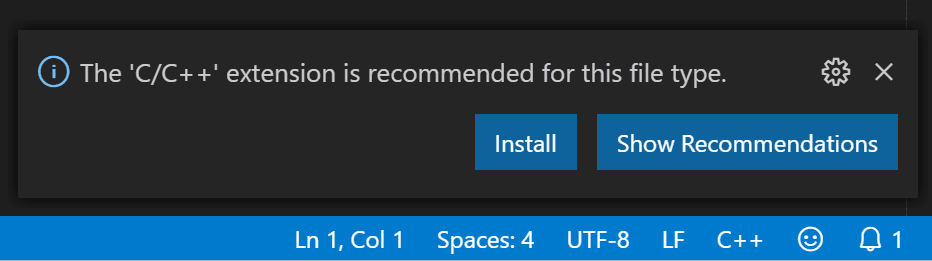
Choose Install and then Reload Required when the button is displayed in the Extensions view to complete installing the C/C++ extension.
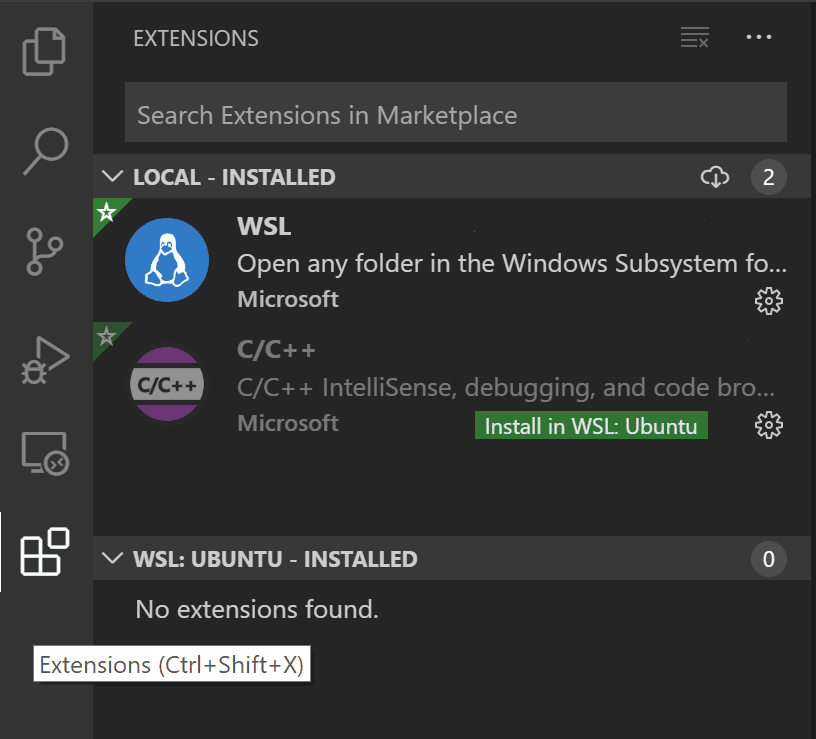
If you already have C/C++ language extensions installed locally in VS Code, you’ll need to go to the Extensions view (⇧⌘X (Windows, Linux Ctrl+Shift+X)) and install those extensions into WSL. Locally installed extensions can be installed into WSL by selecting the Install in WSL button and then Reload Required.
Add hello world source code
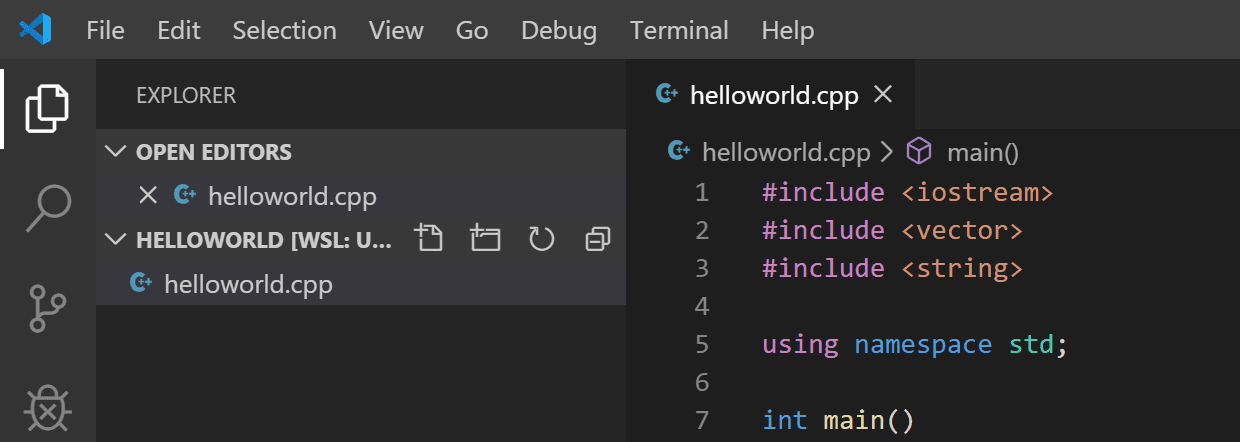
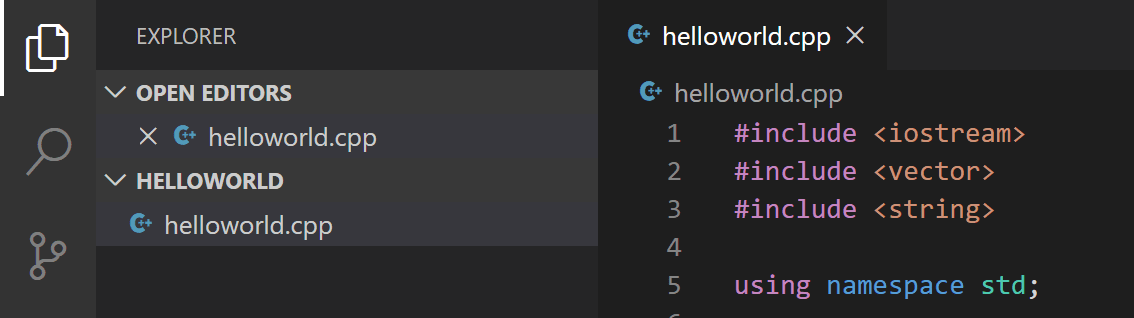
Now paste in this source code:
Now press ⌘S (Windows, Linux Ctrl+S) to save the file. Notice how the file you just added appears in the File Explorer view (⇧⌘E (Windows, Linux Ctrl+Shift+E)) in the side bar of VS Code:
You can also enable to automatically save your file changes, by checking Auto Save in the main File menu.
The Activity Bar on the far left lets you open different views such as Search, Source Control, and Run. You’ll look at the Run view later in this tutorial. You can find out more about the other views in the VS Code User Interface documentation.
Step through the code
Now you’re ready to start stepping through the code.
-
Click or press the Step over icon in the debugging control panel.
This will advance program execution to the first line of the for loop, and skip over all the internal function calls within the and classes that are invoked when the variable is created and initialized. Notice the change in the Variables window on the left.
In this case, the errors are expected because, although the variable names for the loop are now visible to the debugger, the statement has not executed yet, so there is nothing to read at this point. The contents of are visible, however, because that statement has completed.
-
Press Step over again to advance to the next statement in this program (skipping over all the internal code that is executed to initialize the loop). Now, the Variables window shows information about the loop variables.
-
Press Step over again to execute the statement. (Note that as of the March 2019 release, the C++ extension does not print any output to the Debug Console until the loop exits.)
-
If you like, you can keep pressing Step over until all the words in the vector have been printed to the console. But if you are curious, try pressing the Step Into button to step through source code in the C++ standard library!
To return to your own code, one way is to keep pressing Step over. Another way is to set a breakpoint in your code by switching to the tab in the code editor, putting the insertion point somewhere on the statement inside the loop, and pressing F9. A red dot appears in the gutter on the left to indicate that a breakpoint has been set on this line.
Then press F5 to start execution from the current line in the standard library header. Execution will break on . If you like, you can press F9 again to toggle off the breakpoint.
When the loop has completed, you can see the output in the Integrated Terminal, along with some other diagnostic information that is output by GDB.
Step 5: It’s DONE!!
Now to execute the programs you need to open the bIn directry. And then right click anywhere with the shift key pressed. You should see a option named ‘ open command window here ‘. If you can’t do it then just Go to the upper left corner and click on File. Select ‘open command prompt’ and cmd window will appear on screen.
Now if have pasted the codes inside a subfolder in bin, then type in ‘cd ‘ ( exclude <> ) and enter. If you have just pasted the code directly in bin, don’t need to do anything.
WINDOWS 10 USER, DISABLE YOUR ANTIVIRUS OR ADD A EXCEPTION SO THAT YOUR ANTIVIRUS PROGRAM DON’T SCAN THE bin FOLDER.
To compile C program type ‘gcc’ and then type in the program name with the .c extension ( because gcc complies C programs ) with a space in between. Press Enter. Wait for some seconds before the same directory name comes again in the cmd screen. It means the program is compiled. To run just type ‘a’ and press enter.
Now you should see ‘ ****** HELLO WORLD ***** ‘ on the cmd screen. That is gven the code and that means everything has been done correctly.
For C++ everything is same except the compiler will be G++, not gcc. And the program extension will be .cpp.
So now you can write your codes and compile then easily. No heavy software, no time waste by creating projects. Everything is simple and clear.
Happy Coding.
Introduction
Generally speaking, a cross-compiler is a compiler that runs on platform A (the host), but generates executables for platform B (the target). These two platforms may (but do not need to) differ in CPU, operating system, and/or executable format. In our case, the host platform is your current operating system and the target platform is the operating system you are about to make. It is important to realize that these two platforms are not the same; the operating system you are developing is always going to be different from the operating system you currently use. This is why we need to build a cross-compiler first, you will most certainly run into trouble otherwise.
Why cross-compilers are necessary
- Main article: Why do I need a Cross Compiler?
You need to use a cross-compiler unless you are developing on your own operating system. The compiler must know the correct target platform (CPU, operating system), otherwise you will run into trouble. If you use the compiler that comes with your system, then the compiler won’t know it is compiling something else entirely. Some tutorials suggest using your system compiler and passing a lot of problematic options to the compiler. This will certainly give you a lot of problems in the future and the solution is build a cross-compiler. If you have already attempted to make an operating system without using a cross-compiler, please read the article Why do I need a Cross Compiler?.
Which compiler version to choose
- Main article: Building GCC
The newest GCC is recommended as it is the latest and greatest release. For instance, you may run into trouble if you use GCC 4.6.3 to build a GCC 4.8.0 cross-compiler. If you are not using the latest major GCC release for your system compiler, we recommend that you build the newest GCC as your system compiler.
You can also use older releases as they are usually reasonably good. If your local system compiler isn’t too terribly old (at least GCC 4.6.0), you may wish to save yourself the trouble and just pick the latest minor release (such as 4.6.3 if your system compiler is 4.6.1) for your cross-compiler.
You can view your current compiler version by invoking:
gcc --version
You may be able to use an older major GCC release to build a cross-compiler of a newer major GCC release. For instance, GCC 4.7.3 may be able to build a GCC 4.8.0 cross-compiler. However, if you want to use the latest and greatest GCC version for your cross-compiler, we recommend that you bootstrap the newest GCC as your system compiler first. Individuals using OS X 10.7 or earlier might want to invest in either building a system GCC (that outputs native Mach-O), or upgrading the local LLVM/Clang installation. Users with 10.8 and above should install the Command Line Tools from Apple’s developer website and use Clang to cross-compile GCC.
Which binutils version to choose
- Main article: Cross-Compiler Successful Builds
We recommend that you use the latest and greatest Binutils release. Note, however, that not all combinations of GCC and Binutils work. If you run into trouble, use a Binutils that was released at roughly the same time as your desired compiler version. You probably need at least Binutils 2.22, or preferably the latest 2.23.2 release. It doesn’t matter what Binutils version you have installed on your current operating system. You can find out the binutils version for example by this command:
ld --version
Deciding on the target platform
- Main article: Target Triplet
You should already know this. If you are following the Bare Bones tutorial, you wish to build a cross-compiler for i686-elf.
Note on arm-none-eabi-gcc
There is the prebuilt package gcc-arm-none-eabi on apt-get for Debiab/Ubuntu, but you shouldn’t use it because it neither contains a libgcc.a nor freestanding C header files like stdint.h.
Instead you should build it yourself with arm-none-eabi being the $TARGET.
Create Hello World
From the Developer Command Prompt, create an empty folder called «projects» where you can store all your VS Code projects, then create a subfolder called «helloworld», navigate into it, and open VS Code () in that folder () by entering the following commands:
The «code .» command opens VS Code in the current working folder, which becomes your «workspace». As you go through the tutorial, you will see three files created in a folder in the workspace:
- (build instructions)
- (debugger settings)
- (compiler path and IntelliSense settings)
In the File Explorer title bar, select the New File button and name the file .
Add hello world source code
Now paste in this source code:
Now press ⌘S (Windows, Linux Ctrl+S) to save the file. Notice how the file you just added appears in the File Explorer view (⇧⌘E (Windows, Linux Ctrl+Shift+E)) in the side bar of VS Code:
You can also enable to automatically save your file changes, by checking Auto Save in the main File menu.
The Activity Bar on the far left lets you open different views such as Search, Source Control, and Run. You’ll look at the Run view later in this tutorial. You can find out more about the other views in the VS Code User Interface documentation.