Установка github desktop и его базовое использование
Содержание:
- Fork репозитория
- Клонируем репозиторий
- Learn GitHub with GitHub
- Скачивание через qBittorrent
- Part 1: Installing and authenticating
- Что такое Git и зачем он нужен?
- Part 3: Contributing to projects with GitHub Desktop
- Part 3: Exploring GitHub Desktop
- Quick Start: Windows
- GitHub Actions
- Как пользоваться Git?
- Создаем свой первый проект и выкладываем на GitHub
- Our most popular courses
- Miscellanea
- Ветки
- Создание ветки
- GitHub’s Logos
- 1. Git Transport Helper
- Преимущества
- Регистрация на GitHub
- Features
- Part 4: Publishing your repository to GitHub
- Как заработать больше
- Install Git on Linux
Fork репозитория
Fork (форк) репозитория это возможность скопировать чужой репозитория на свой аккаунт и вносить любые изменения в него, без изменения оригинального репозитория. Можно сделать форк любого доступного репозитория. При создании форка нас спросят в какой аккаунт мы хотим его добавить.
В чем же отличие от клонирования репозитория? При клонировании мы только используем файлы оригинального репозитория и при создании коммита с какими-то изменениями, GitHub Desktop скажет нам, что у нас нет доступа на запись и сам предложит сделать форк. (Если доступ к этому репозиторию у нас есть, то сделать коммит мы сможем.) А если мы сделали форк, то изменения уйдут в нашу копию в нашем аккаунте.
Fork может быть полезен при разработки открытого ПО, например, мы сделали форк алгоритма сжатия, в нем мы изменили функцию сжатия и теперь алгоримт сжимает в 10 раз лучше. Мы можем сделать Pull request, т.е. запросить у хозяина оригинального репозитория с алгоритмом сжатия, интегрировать наши изменения в его репозиторий.
Клонируем репозиторий
Теперь нам нужно сделать локальную копию нашего удалённого репозитория. Мы снова воспользуемся кнопкой Clone or download, но теперь используем полную ссылку на репозиторий; эту ссылку нужно скопировать (Если у вас окошко выглядит не так как на картинке, то нажмите в окне на ссылку справа сверху Use HTTPS).

Для дальнеших шагов нам потребуется скачать и установить GitHub Desktop. После установки и первого запуска, возможно, потребуется войти в ваш аккаунт GitHub. Далее выбираем Clone repository или через File, а затем уже Clone repository.

Тут мы выбираем из списка репозиторий:

Тут мы вставляем ссылку на репозиторий:

Вне зависимости от выбора, все файлы с удаленного репозитория перейдут в указанную папку.
Learn GitHub with GitHub
Learn how to create a site or blog from your GitHub repositories with GitHub Pages.
GitHub
GitHub Pages
Community starter kit
There are millions of projects on GitHub, all competing for attention from the millions of open source contributors available to help. Learn how to help your project stand out.
GitHub
Open Source
Uploading your project to GitHub
You’re an upload away from using a full suite of development tools and premier third-party apps on GitHub. This course helps you seamlessly upload your code to GitHub and introduces you to exciting next steps to elevate your project.
Git
GitHub
Migrating your repository to GitHub
You’re a migration away from using a full suite of development tools and premier third-party apps on GitHub. This course helps you seamlessly move code to GitHub and sets you up to do more after you make the move.
Git
GitHub
See how collaboration works on GitHub and start building great things, together.
GitHub
Managing merge conflicts
Merge conflicts are a normal part of working in Git. Learn why they happen and how to resolve them with ease.
Git
Merge conflicts
GitHub
Security strategy essentials
Learn security best practices and keep your project’s contributions—and contributors—safe.
Security
Dependency management
Rebasing
Auditing
Dependabot
Learn security best practices and keep your project’s contributions—and contributors—safe.
Git
GitHub
Скачивание через qBittorrent
При скачивании файлов есть опасность потратить свои BTT, они будут потрачены на ускорение скачивания.
Для предотвращения этого можно скачивать торрент другим клиентом и в автоматическом режиме передавать их в μTorrent/BitTorrent.
- Переходим в настройки QBittorrent: Сервис -> Настройки… -> Загрузки
- указываем Путь сохранения по умолчанию, это папка куда будут скачиваться торренты.
- указываем Копировать торрент-файлы завершенных загрузок в, сюда будут сохранены торрент файлы для передачи их в μTorrent/BitTorrent.
- Переходим в настройки QBittorrent: Сервис -> Настройки… -> BitTorrent
- В самом низу находим Ограничения раздачи
- Ставим галку По достижению рейтинга раздачи в значение: 0
- В пункте затем выбираем Остановить торрент
- Заходим в μTorrent Настройки -> Настройки программы
- указываем путь Помещать загружаемые файлы в как у QBittorrent.
- ставим галку у пункта Automatically load torrents from и указываем путь куда QBittorrent сохраняет торрент файлы.
Part 1: Installing and authenticating
You can install GitHub Desktop on any supported operating system. For more information, see «Supported operating systems.»
To install GitHub Desktop, visit the download page for GitHub Desktop. For more information, see «Installing GitHub Desktop.»
After you have installed GitHub Desktop, you can authenticate the application with your account on GitHub or GitHub Enterprise. Authenticating allows you to connect to remote repositories on GitHub or GitHub Enterprise.
-
Before you can authenticate to GitHub or GitHub Enterprise, you will need an account. For more information about creating an account, see «Signing up for a new GitHub account» or contact your GitHub Enterprise site administrator.
-
In the GitHub Desktop drop-down menu, click Preferences. In the preferences window, click Accounts and follow the steps to sign in. For more information on authenticating, see «Authenticating to GitHub.»
-
Before you can authenticate to GitHub or GitHub Enterprise, you will need an account. For more information about creating an account, see «Signing up for a new GitHub account» or contact your GitHub Enterprise site administrator.
-
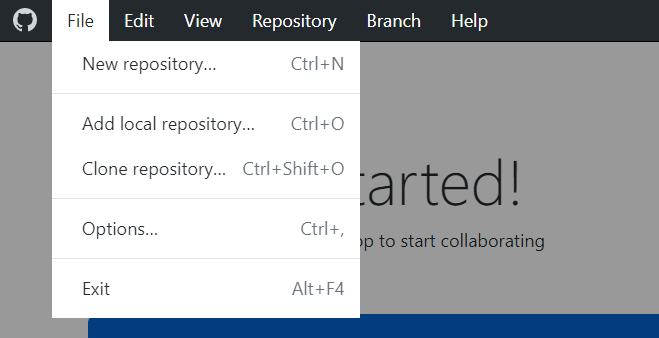
In the File drop-down menu, click Options. In the options window, click Accounts and follow the steps to sign in. For more information on authenticating, see «Authenticating to GitHub.»
Что такое Git и зачем он нужен?
Git — это консольная утилита, для отслеживания и ведения истории изменения файлов, в вашем проекте. Чаще всего его используют для кода, но можно и для других файлов. Например, для картинок — полезно для дизайнеров.
С помощью Git-a вы можете откатить свой проект до более старой версии, сравнивать, анализировать или сливать свои изменения в репозиторий.
Репозиторием называют хранилище вашего кода и историю его изменений. Git работает локально и все ваши репозитории хранятся в определенных папках на жестком диске.
Так же ваши репозитории можно хранить и в интернете. Обычно для этого используют три сервиса:
Каждая точка сохранения вашего проекта носит название коммит (commit). У каждого commit-a есть hash (уникальный id) и комментарий. Из таких commit-ов собирается ветка. Ветка — это история изменений. У каждой ветки есть свое название. Репозиторий может содержать в себе несколько веток, которые создаются из других веток или вливаются в них.
Part 3: Contributing to projects with GitHub Desktop
After installing, authenticating, and configuring the app, you are ready to start using GitHub Desktop. You can create, add, or clone repositories and use GitHub Desktop to manage contributions to your repositories.
You can create a new repository by selecting the File menu and clicking New repository…. For more information, see «Creating your first repository using GitHub Desktop.»
You can add a repository from your local computer by selecting the File menu and clicking Add Local Repository…. For more information, see «Adding a repository from your local computer to GitHub Desktop.»
You can clone a repository from GitHub by selecting the File menu and clicking Clone Repository…. For more information, see «Cloning and Forking Repositories from GitHub Desktop.»

You can use GitHub Desktop to create a branch of a project. Branches isolate your development work from other branches in the repository, so that you can safely experiment with changes. For more information, see «Managing branches.»
After you make changes to a branch, you can review them in GitHub Desktop and make a commit to keep track of your changes. For more information, see «Committing and reviewing changes to your project.»

If you want to access your changes remotely or share them with other people, you can push your commits to GitHub. For more information, see «Pushing changes to GitHub.»
You can use GitHub Desktop to create issues or pull requests to collaborate on projects with other people. Issues help you keep track of ideas and discuss possible changes to projects. Pull requests let you share your proposed changes with others, receive feedback, and merge changes into a project. For more information, see «Creating an issue or pull request.»»
You can view your own or your collaborator’s pull requests in GitHub Desktop. Viewing a pull request in GitHub Desktop lets you see any proposed changes and make additional changes by opening the project’s files and repositories in your default text editor. For more information, see «Viewing a pull request in GitHub Desktop.»
When you make changes to your local repositories or when other people make changes to the remote repositories, you will need to sync your local copy of the project with the remote repository. GitHub Desktop can keep your local copy of a project in sync with the remote version by pushing and pulling commits. For more information, see «Syncing your branch.»
Part 3: Exploring GitHub Desktop
In the file menu at the top of the screen, you can access settings and actions that you can perform in GitHub Desktop. Most actions also have keyboard shortcuts to help you work more efficiently. For a full list of keyboard shortcuts, see «Keyboard shortcuts.»
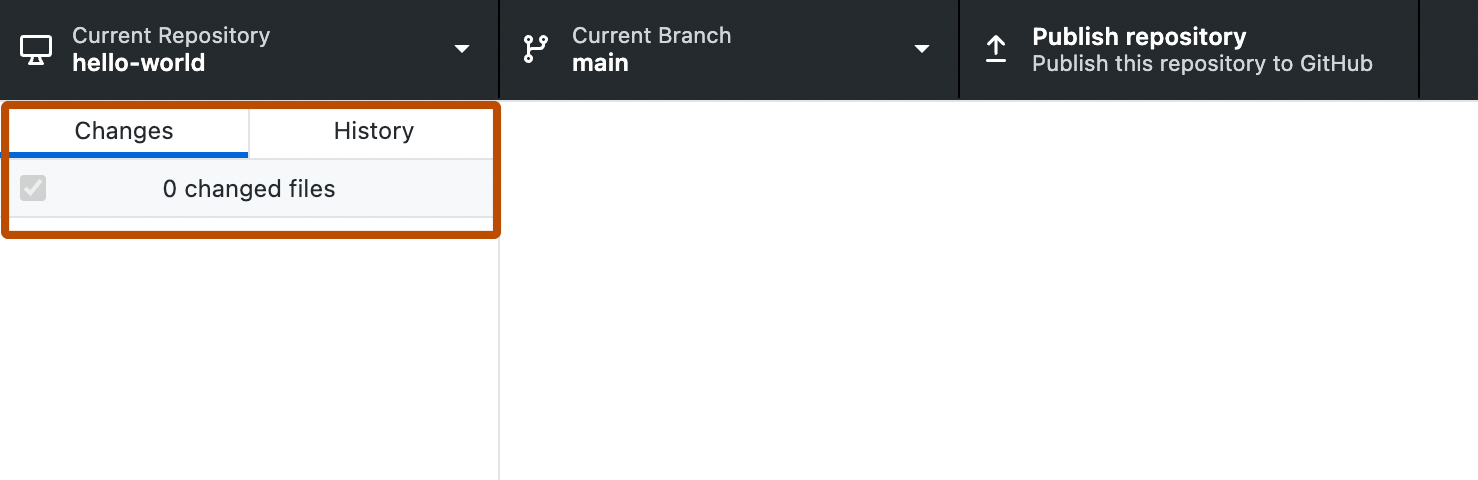
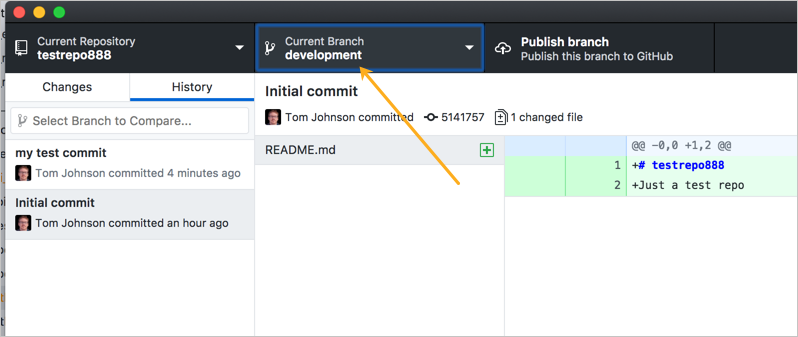
At the top of the GitHub Desktop app, you will see a bar that shows the current state of your repository.
-
Current repository shows the name of the repository you’re working on. You can click Current repository to switch to a different repository in GitHub Desktop.
-
Current branch shows the name of the branch you’re working on. You can click Current branch to view all the branches in your repository, switch to a different branch, or create a new branch. Once you create pull requests in your repository, you can also view these by clicking on Current branch.
-
Publish repository appears because you haven’t published your repository to GitHub yet, which you’ll do later in the next step. This section of the bar will change based on the status of your current branch and repository. Different context dependent actions will be available that let you exchange data between your local and remote repositories.
In the left sidebar, you’ll find the Changes and History views.
-
The Changes view shows changes you’ve made to files in your current branch but haven’t committed to your local repository. At the bottom, there is a box with «Summary» and «Description» text boxes and a Commit to BRANCH button. This is where you’ll commit new changes. The Commit to BRANCH button is dynamic and will display which branch you’re committing your changes to.
-
The History view shows the previous commits on the current branch of your repository. You should see an «Initial commit» that was created by GitHub Desktop when you created your repository. To the right of the commit, depending on the options you selected while creating your repository, you may see .gitattributes, .gitignore, LICENSE, or README files. You can click each file to see a diff for that file, which is the changes made to the file in that commit. The diff only shows the parts of the file that have changed, not the entire contents of the file.
Quick Start: Windows
Prerequisites:
- Windows 7 or newer
First, download and bootstrap vcpkg itself; it can be installed anywhere,
but generally we recommend using vcpkg as a submodule for CMake projects,
and installing it globally for Visual Studio projects.
We recommend somewhere like or ,
since otherwise you may run into path issues for some port build systems.
> git clone https://github.com/microsoft/vcpkg
> .\vcpkg\bootstrap-vcpkg.bat
To install the libraries for your project, run:
> .\vcpkg\vcpkg install
Note: This will install x86 libraries by default. To install x64, run:
> .\vcpkg\vcpkg install :x64-windows
Or
> .\vcpkg\vcpkg install --triplet=x64-windows
You can also search for the libraries you need with the subcommand:
> .\vcpkg\vcpkg search
In order to use vcpkg with Visual Studio,
run the following command (may require administrator elevation):
> .\vcpkg\vcpkg integrate install
After this, you can now create a New non-CMake Project (or open an existing one).
All installed libraries are immediately ready to be ‘d and used
in your project without additional configuration.
If you’re using CMake with Visual Studio,
continue .
In order to use vcpkg with CMake outside of an IDE,
you can use the toolchain file:
> cmake -B  -S . -DCMAKE_TOOLCHAIN_FILE=/scripts/buildsystems/vcpkg.cmake
> cmake --build
With CMake, you will still need to and the like to use the libraries.
Check out the for more information,
including on using CMake with an IDE.
For any other tools, including Visual Studio Code,
check out the integration guide.
GitHub Actions
Create a GitHub Action and use it in a workflow.
GitHub Actions
Workflows
Hello World
GitHub Actions: Continuous Integration
Learn how to create workflows that enable you to use Continuous Integration (CI) for your projects.
GitHub Actions
Workflows
CI
Continuous Integration
Integration
GitHub Actions: Publish to GitHub Packages
This course will walk you through using GitHub Actions to get your code in a deployable state once your CI workflows have completed.
GitHub Actions
GitHub Packages
Deployment
Workflows
Docker
GitHub Actions: Continuous Delivery with Azure
Create two deployment workflows using GitHub Actions and Microsoft Azure.
GitHub Actions
Microsoft Azure
Workflows
CD
Deployment
GitHub Actions: Writing JavaScript Actions
Learn how to write your own GitHub JavaScript Action! This course will empower you to begin automating customized tasks unique to your workflow.
JavaScript
API
Actions toolkit
GitHub Secrets
Workflows
GitHub Actions: Write Docker container actions
Learn how to write your own GitHub Docker container action! This course will empower you to begin automating customized tasks unique to your workflow.
Docker
Containers
Workflows
Application programming interface (API)
Publishing GitHub Actions
GitHub Actions: Using GitHub Script
This course covers how to use GitHub Script to quickly use octokit/rest in a GitHub Actions workflow.
GitHub Actions
Octokit
Workflow
Automation
Application programming interface (API)
Как пользоваться Git?
Дальше я буду предполагать, что вы выполнили установку и базовую настройку git. Кроме установки, вам нужно указать правильный адрес электронной почты и имя пользователя для доступа к серверу Git, например, на GitHub. Если вы этого еще не сделали смотрите инструкцию установка Git в Ubuntu 16.04.
Обычно, структура проекта в Git будет зависеть от масштаба и сложности вашей программы. Но для начала мы будем использовать проект, состоящий только из одной ветви. Каждый проект содержит одну ветку по умолчанию, она называется master. Наш первый проект будет называться test.
Создание проекта
Когда настройка git завершена перейдем к вашему проекту. В самом начале вам достаточно создать папку для файлов проекта. Если вы собираетесь работать над несколькими проектами, создайте папку git в вашем домашнем каталоге, а уже туда поместите папки ваших проектов:
Эта команда создаст нужную структуру папок и переводит текущий каталог в только что созданный. Теперь создадим первый файл нашего проекта:
Проект готов, но система контроля версий git еще не знает об этом.
Настройка проекта в git
Перед тем как git начнет отслеживать изменения, нужно подготовить все необходимые конфигурационные файлы. Сначала инициализируем пустой репозиторий в нашей папке:
После того как репозиторий будет создан, вам нужно добавить свои файлы в него. Каждый файл нужно добавлять отдельно или сказать утилите, что необходимо добавить все файлы явно. Пока вы не добавите файл сам он не будет отслеживаться. Новые файлы в будущем тоже нужно добавлять, они не добавляются автоматически. Сначала добавим текущую папку:
Если все прошло хорошо, то команда ничего не выведет.
Фиксация изменений
Изменения тоже автоматически не отслеживаются. Фиксация изменений выполняется с помощью команды commit. Вам нужно указать что было изменено с помощью небольшого комментария, буквально в несколько предложений. Хорошая практика выполнять фиксацию перед каждым серьезным изменением.
Таким образом, вы будете хранить все версии проекта, от самой первой и до текущей, а также сможете знать что, когда и где было изменено. Чтобы создать свой первый коммит выполните:
Команде необходимо передать два параметра, первый — это -m, ваш комментарий, второй -a, означает, что нужно применить действие ко всем измененным файлам. Для первого раза используется этот параметр, но обычно вам нужно указать измененные файлы или каталоги. Например, можно делать так:
Отправка изменений
До этого момента мы делали все в локальном репозитории. Вы можете использовать git локально, если нужен только контроль версий, но иногда нужно обменяться информацией с другими разработчиками и отправить данные в удаленный репозиторий.
Сначала нужно добавить удаленный репозиторий с помощью команды remote. Для этого нужно передать ей URL:
Затем можно посмотреть список удаленных репозиториев:
Вы можете использовать не только github сервера, но и любые другие. Теперь для отправки ваших изменений используйте такую команду:
Команда push указывает, что нужно отправить данные в удаленный репозиторий, origin — наш настроенный репозиторий, а master — ветвь.
Управление ветвями
Для простых проектов достаточно одной ветви. Но если проект большой и он имеет несколько версий, в том числе тестовую, то может понадобиться создать для каждой из них отдельную ветвь. Сначала смотрим доступные ветви:
Опция -a указывает что нужно вывести все ветви, даже не синхронизированные. Звездочка указывает на активную ветвь. Теперь создадим ветвь для разработки с помощью команды checkout:
Переключаться между ветвями можно тоже с помощью той же команды:
Теперь создадим еще один файл:
И добавим его в нашу новую ветвь develop:
Сделаем коммит для внесенных изменений:
Дальше проверим существует ли этот файл в основной ветке master или только в дополнительной. Смотрим текущую ветку:
Затем переключаемся на ветку master и снова смотрим:
Здесь файла нет, так и должно быть. В git есть такая полезная вещь, как слияние. С помощью нее вы можете объединить две ветви. Например, переместить код из рабочей ветки в стабильную. Для этого достаточно выполнить команду merge:
Перед тем как будет выполнено слияние вам нужно ввести комментарий, зачем это нужно. Затем если вы еще раз выполните ls, то увидите, что здесь уже есть нужный файл. Наши примеры git подошли к концу.
Создаем свой первый проект и выкладываем на GitHub
Давайте разберемся как это сделать, с помощью среды разработки Visual Studio Code (VS Code).
Перед началом предлагаю зарегистрироваться на GitHub.
Создайте папку, где будет храниться ваш проект. Если такая папка уже есть, то создавать новую не надо.
После открываем VS Code .
-
Установите себе дополнительно анализаторы кода для JavaScript и PHP
-
Откройте вашу папку, которую создали ранее
После этого у вас появится вот такой интерфейс
-
Здесь будут располагаться все файлы вашего проекта
-
Здесь можно работать с Git-ом
-
Кнопка для создания нового файла
-
Кнопка для создания новой папки
Давайте теперь перейдем во вкладу для работы с Git-ом.
Откроется вот такое окно:
-
Кнопка для публикации нашего проекта на GitHub
-
После нажатия на кнопку , появится всплывающее окно. Нужно выбрать второй вариант или там где присутствует фраза
После того, как выбрали «Опубликовать на GitHub публичный репозиторий» (пункт 2), программа предложит вам выбрать файлы, которые будут входить в первый commit. Проставляем галочки у всех файлов, если не проставлены и жмем . Вас перекинет на сайт GitHub, где нужно будет подтвердить вход в аккаунт.
Вы создали и опубликовали репозиторий на GitHub.
Теперь сделаем изменения в коде и попробуем их снова опубликовать. Перейдите во вкладку с файлами, отредактируйте какой-нибудь файл, не забудьте нажать (Windows) или (MacOS), чтобы сохранить файл. Вернитесь обратно во вкладу управления Git.
Если посмотреть на значок вкладки Git, то можно увидеть цифру 1 в синем кружке. Она означает, сколько файлов у нас изменено и незакоммичено. Давайте его закоммитим и опубликуем:
-
Кнопка для просмотра изменений в файле. Необязательно нажимать, указал для справки
-
Добавляем наш файл для будущего commit
-
Пишем комментарий
-
Создаем commit
-
Отправляем наш commit в GitHub
Поздравляю, вы научились создавать commit и отправлять его в GitHub!
Итог
Это первая вводная статья по утилите Git. Здесь мы рассмотрели:
-
Как его устанавливать
-
Как его настраивать
-
Как инициализировать репозиторий и создать commit через консоль
-
Как на примере VS Code, опубликовать свой код на GitHub
Забегая вперед, советую вам погуглить, как работают следующие команды:
P.S. Для облегчения обучения, оставлю вам ссылку на бесплатный тренажер по Git.
Our most popular courses
Introduction to GitHub
If you are looking for a quick and fun introduction to GitHub, you’ve found it. This class will get you started using GitHub in less than an hour.
Git
GitHub Pages
Branches
Commits
Pull Requests
Create a GitHub Action and use it in a workflow.
GitHub Actions
Workflows
Hello World
Communicating using Markdown
This course will walk you through everything you need to start organizing ideas and collaborating using Markdown, a lightweight language for text formatting.
GitHub
Markdown
Learning should be fun
There are no simulations or boring tutorials here, just hands-on lessons created with by the GitHub community and taught by the friendly Learning Lab bot.
Miscellanea
- If you configure the Software to work with one or more accounts on the GitHub.com website or with an instance of GitHub Enterprise, your use of the Software will also be governed by the GitHub.com website Terms of Service and/or the license agreement applicable to your instance of GitHub Enterprise.
- The failure of GitHub to exercise or enforce any right or provision of this EULA shall not constitute a waiver of such right or provision.
- This EULA constitutes the entire agreement between you and GitHub and governs your use of the Software, superseding any prior agreements between you and GitHub (including, but not limited to, any prior versions of the EULA).
- You agree that this EULA and your use of the Software are governed under California law and any dispute related to the Software must be brought in a tribunal of competent jurisdiction located in or near San Francisco, California.
- Please send any questions about this EULA to support@github.com.
Ветки
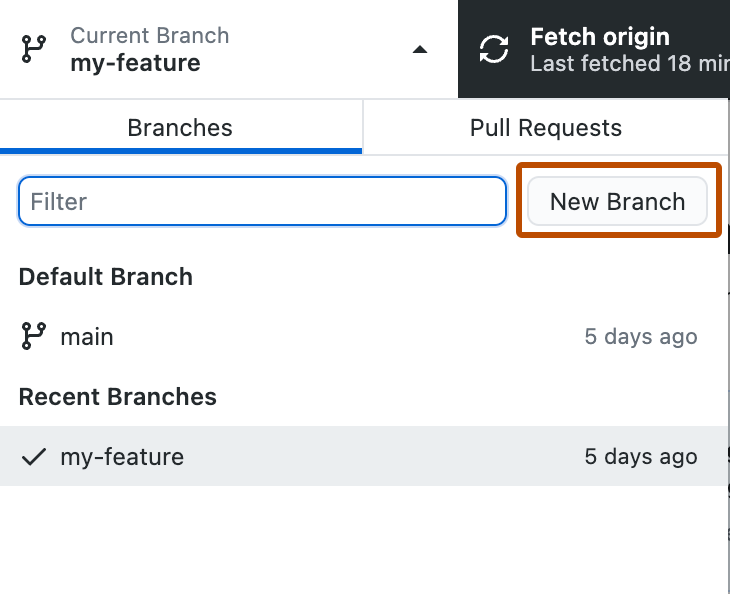
В git есть понятие branch (ветка). Ветка — это покоммитный “путь” до некоторого коммита, называемого “концом” (tip) ветки. Мы можем иметь несколько независимых веток при работе. Коммит делается в конкретную ветку, по умолчанию это ветка master. Создать новую ветку можно как на сайте, так и в приложении GitHub Desktop. Для этого нужно выбрать вкладку Current branch и нажать на New branch:

Выбираем имя и в эту ветку пойдет вся информация с ветки master (точнее, новая ветка будет “смотреть” на тот же коммит, что и master), в том числе и все файлы:

И теперь мы можем переключать ветки и вносить изменения в конкретную ветку, не затрагивая основную, в данном случае master. Например, мы удалим один файл, и изменим другой. Удалённый файл будет отмечен красным минусом, а изменённый — желтой точкой. При этом справа видно, что мы работаем в ветке Features.

Делаем коммит в новую ветку и смотрим, что произошло. Как мы видим, в ветке master всё осталось, как прежде. Она по прежнему указывает на тот же коммит, что и раньше.

А вот в ветке Features удалённого файла уже нет. Переключить ветку можно, нажав на кнопку Branch с названием ветки:

Ветки удобно использовать для добавления новых функция, что они не ломали рабочий код до новой функции. После разработки ветку можно объединить с master (merge, смёржить, слить) сделав так называемый Pull request.
Создание ветки
Теперь создадим ветку, внесем изменения и посмотрим как влияют изменения на ветку.
В GitHub Desktop переходим в Branch > New Branch и создаем новую ветвь. Назовем ее «development» и нажмем Create Branch.
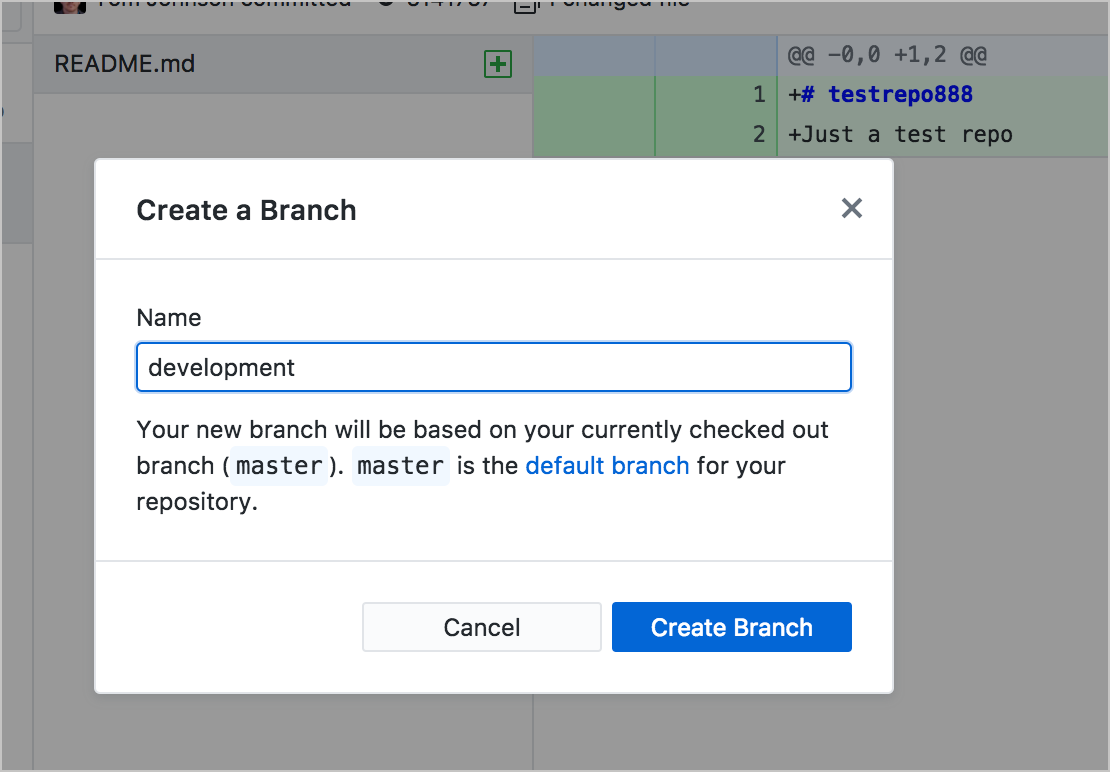 Создание новой ветки
После создания ветки, в центре раскрывающееся меню будет указывать на ту ветку, в которой мы работаем. Создание ветки копирует существующий контент (из ветки master) в новую ветку (development).
 Работа с ветками
Откроем файл, которые ранее создали и внесем в него изменения, например добавим новую строку с текстом
Сохраним изменения.
Вернемся в GitHub Desktop и обратим внимание, что на вкладке «Changes» у нас появились новые измененные файлы.
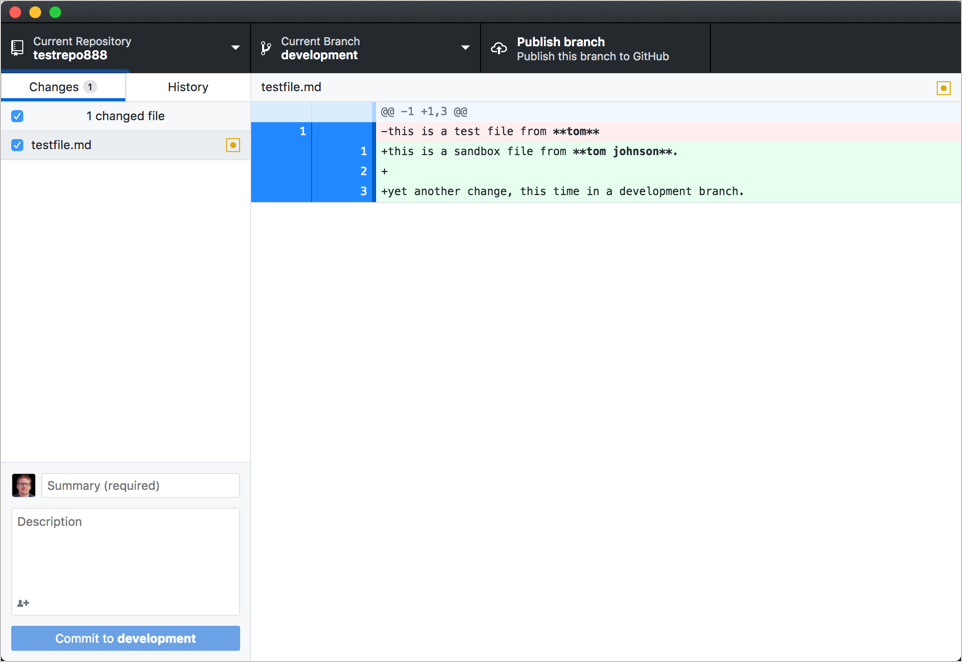
Изменения в файле показывают удаленные строки красным и новые строки зеленым цветом. Цвета помогают увидеть, что изменилось.
Закоммитим изменения в левом нижнем углу и кликнем на Commit to development.
Нажимаем Publish branch (в верхней части окна GitHub Desktop), чтобы сделать локальную ветку также доступной в Origin (GitHub). (Всегда существует две версии ветки: локальная версия и удаленная версия.)
Вернемся в основную ветку (выбираем master в раскрывающемся меню). Затем посмотрим на свой файл (в текстовом редакторе)
Стоит обратить внимание, что изменения, внесенные нами во время редактирования в ветке , не отображаются в основной ветке.
Обычно новую ветку создают, когда вносят значительные изменения в контент. Например, нужно обновить раздел («Раздел X») в своих документах. Возможно, опубликовать другие обновления не нужно, прежде чем публиковать подробные изменения в Разделе X. Если работа была в той же ветке, было бы сложно выборочно загружать обновления для нескольких файлов за пределами Раздела X без отправки обновлений, которые сделали к файлам в разделе Х.
Посредством ветвления можно ограничить свои изменения конкретной версией, которая не запускается, пока не будут готовы изменения к объединению с master веткой.
GitHub’s Logos
The license grant included with the Software is not for GitHub’s
trademarks, which include the Software logo designs. GitHub reserves
all trademark and copyright rights in and to all GitHub trademarks.
GitHub’s logos include, for instance, the stylized designs that
include «logo» in the file title in the «logos» folder.
The names GitHub, GitHub Desktop, GitHub for Mac, GitHub for
Windows, Atom, the Octocat, and related GitHub logos and/or stylized
names are trademarks of GitHub. You agree not to display or use
these trademarks in any manner without GitHub’s prior, written
permission, except as allowed by GitHub’s Logos and Usage Policy: https://github.com/logos.
1. Git Transport Helper
When Git is asked to perform a network operation with a URL that starts with e.g. , it calls and passes the URL as an argument. The remote helper binary is responsible for telling Git what capabilities it has, receiving commands from Git, and downloading objects into the directory.
In GitTorrent’s case, we could be asked for three styles of URL:
- — we connect over to find out what the latest commit is, then perform the download using that commit’s sha1. This is kind of like a CDN for a git server; the actual download of objects happens via peers, but the lookup of which objects to download happens in the normal Git way.
- — the sha1 corresponds to a gittorrent user’s «mutable key» (hash of their public key) on our DHT — we look up the key, receive JSON describing the user’s repositories, and then perform the download using that commit’s sha1. This doesn’t use any resources outside of GitTorrent’s network.
- — the username is converted into a mutable key sha1 as above. The mapping from usernames to sha1s happens on Bitcoin’s blockchain in an OP_RETURN transaction.
Преимущества
Мы рассмотрели только базовое использование Git, GitHub, GitHub Desktop, но уже можем выделить достаточно много преимуществ (на самом деле их намного больше, как и возможностей)
- Возможность фиксировать состояния проекта на необходимых этапах, и иметь доступ к ранним версиям
- Умение пользоваться Git очень часто встречается в вакансиях — будет вашим преимуществом
- На любом устройстве, в любой момент можете получить доступ до актуального проекта
- Возможность делиться своим проектом с другими пользователями GitHub
- Иметь проекты на GitHub большой плюс при поиске работы
- Возможность пользоваться всеми преимуществами Git без командной строки
Регистрация на GitHub
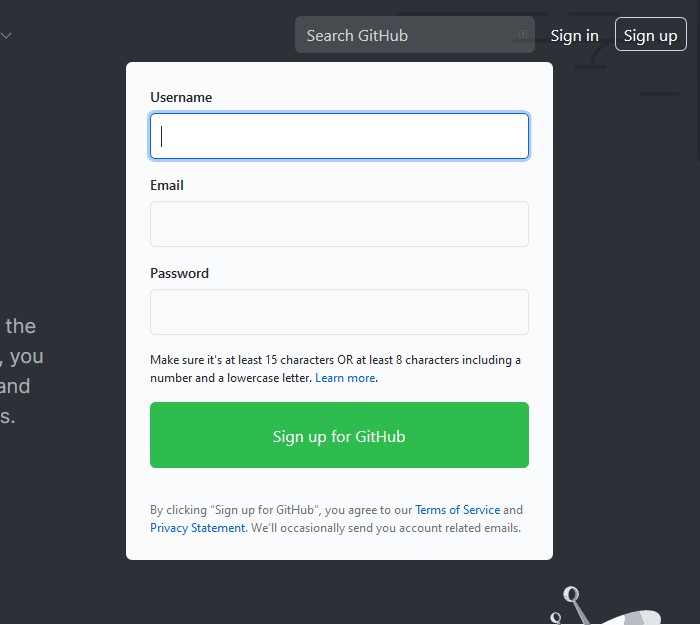
На главной странице заполняем форму справа и нажимаем “Sign up for GitHub”
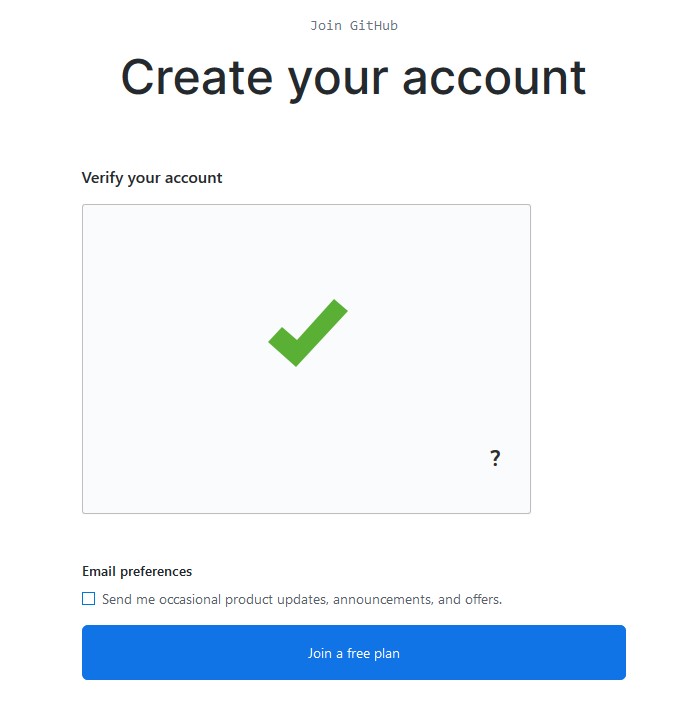
Проходим проверку и нажимаем “Join a free plan”
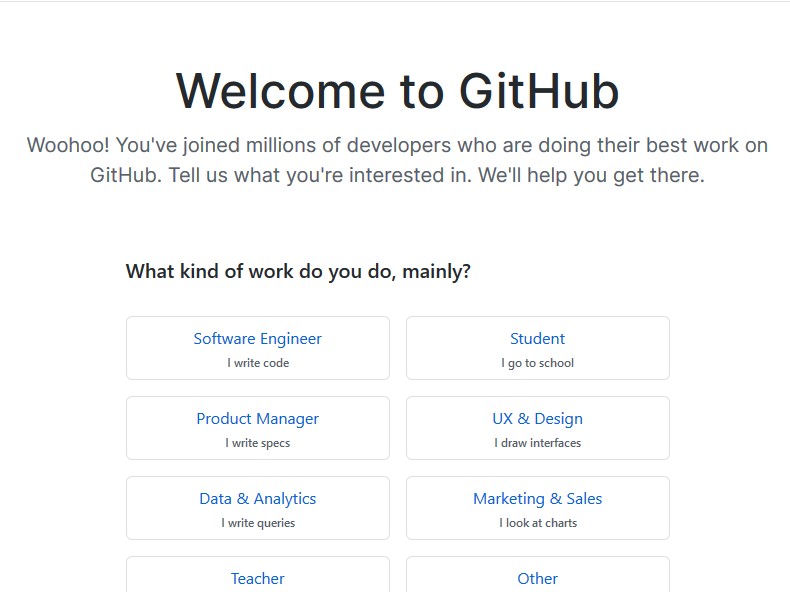
На следующей странице можно заполнить небольшую анкету (можно не заполнять)
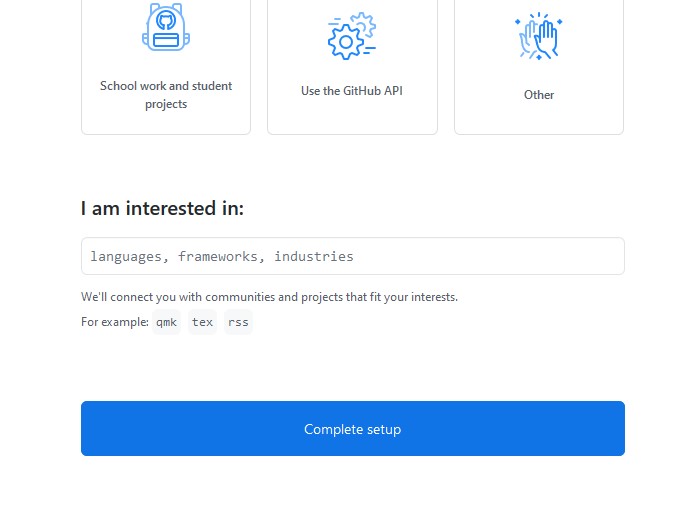
На этой же странице спускаемся в самый низ и нажимаем “Complete setup”
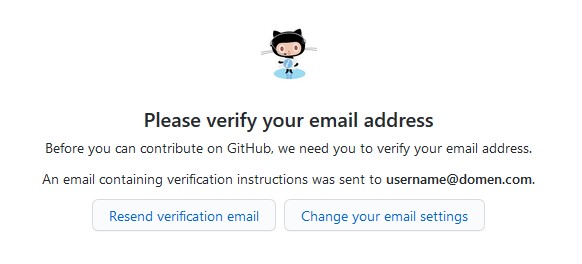
Проверяем свою почту. Если письмо пришло, переходим к следующему пункту.
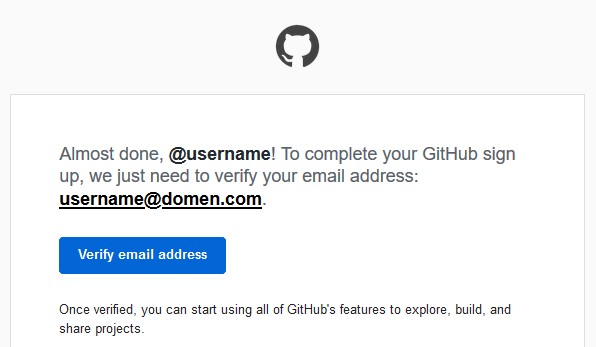
Аккаунт GitHub успешно создан
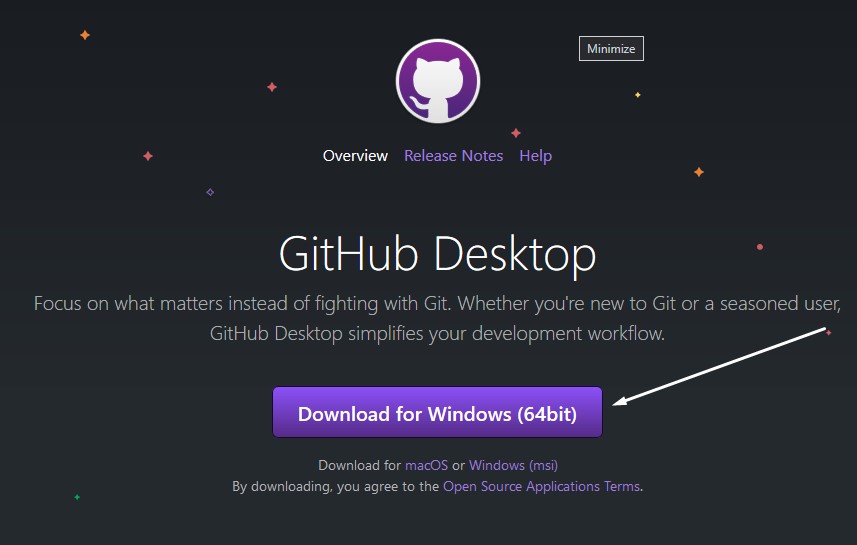
Установка GitHub Desktop
Нажимаем “Download for Windows (64bit)” (операционная система может отличаться)
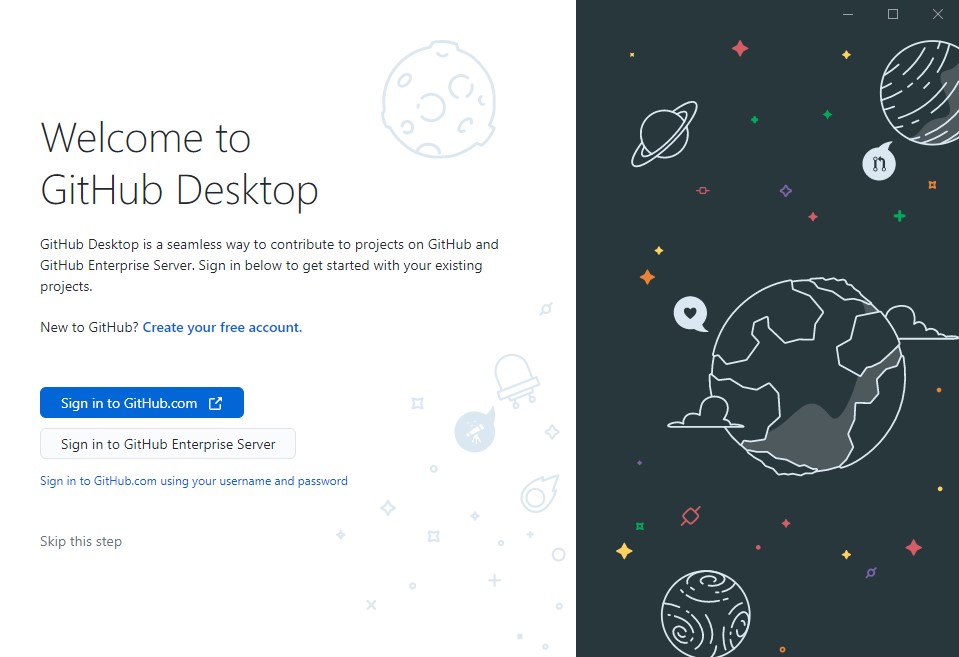
Запускаем скачанный файл. После установки в появившемся окне нажимаем “Sign in to GitHub.com”
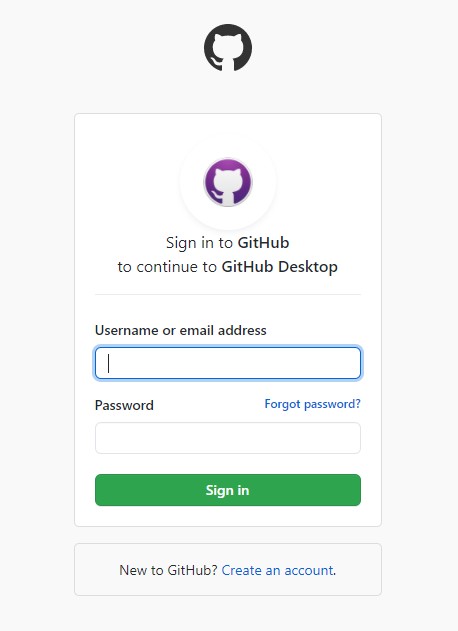
В открывшемся окне браузера вводим в форму свои данные, как при регистрации, и нажимаем “Sign in”
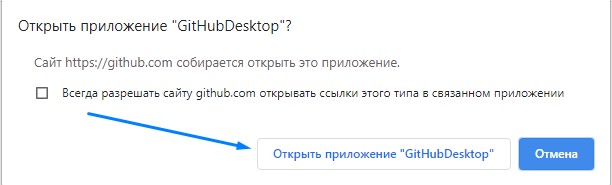
Если браузер запросит, то подтвердить, что нужно “Открыть приложение GitHub Desktop”
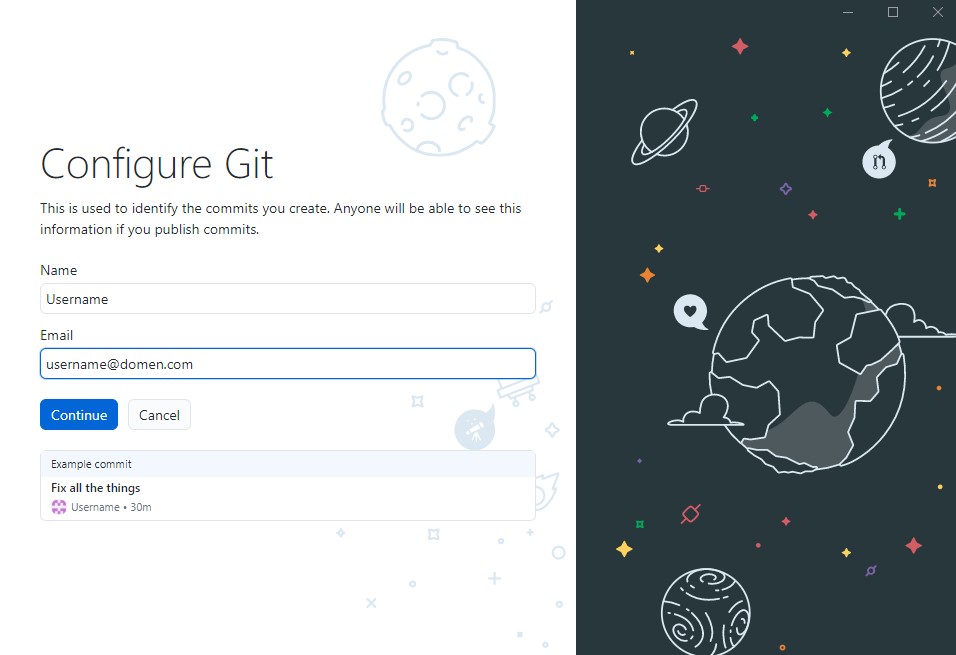
Далее регистрационные данные перенесутся в форму конфигурации (настроек) Git — нажимаем “Continue”
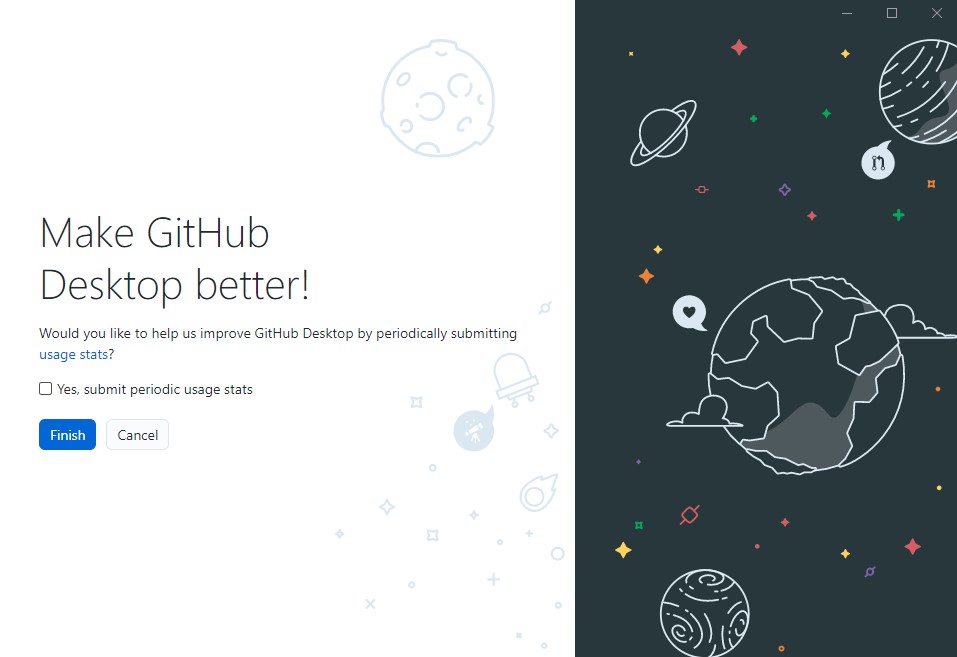
Отключаем пункт “Yes, submit periodic usage stats”, если не хотите периодически передавать статистику работы GitHub Desktop и нажимаем “Finish”
Далее видим начальное окно GitHub Desktop
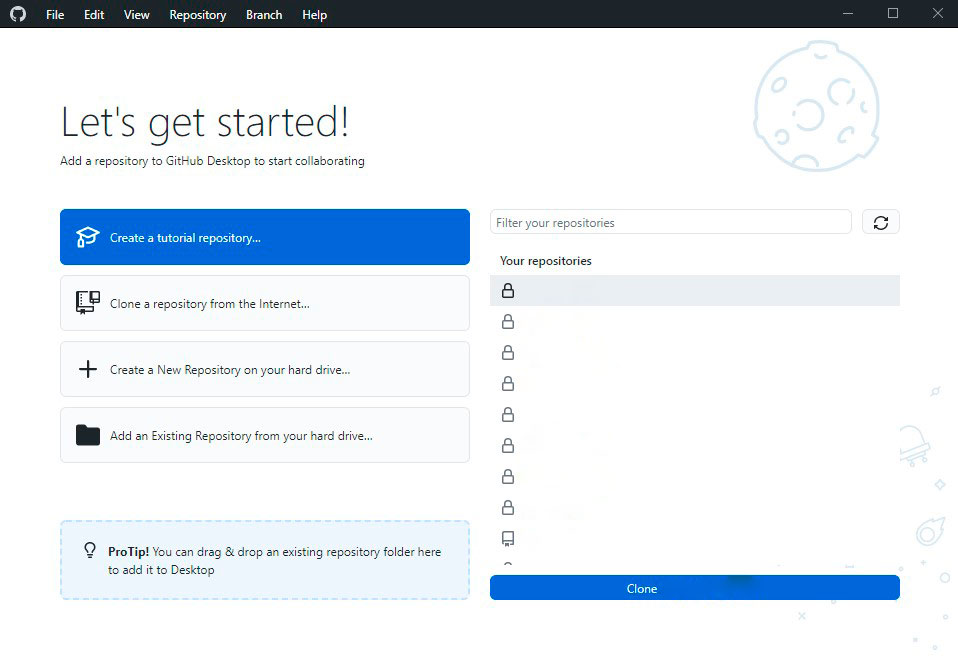
“Create a tutorial repository…“ — создать обучающий репозиторий
“Clone repository from the Internet…“ — клонировать (скопировать/скачать) репозиторий из GitHub к себе на компьютер
“Create a New Repository on your hard drive…“ — создать новый репозиторий на вашем жестком диске (на вашем компьютере) и добавить систему Git в проект
“Add an Existing Repository from your hard drive…“ — добавить на GitHub репозиторий, который уже есть на вашем компьютере и использует Git
Справа будут отображаться ваши репозитории, которые уже загружены на GitHub, но если только что зарегистрировались, то список будет пуст.
Features
-
ALPHA FEATURE Windows Terminal Preview can now be set as the default console host on Windows Insider Dev builds () ()
- There are some known issues with this support; please see this query for the list of known bugs.
- One such known bug is that you will need to resize the window before an application that spawned in Terminal becomes aware of its size.
- Another is that WSL doesn’t work. At all. Sorry!
- If you still want to opt in, head over to the «Startup» section of the settings, or the «Terminal» section of the legacy console property sheet.
- If you really need to run the traditional Windows Console, you can start it with or .
- FINALLY: This feature will only work if you’ve installed Terminal via the MSIX. Unpackaged installations, such as the one offered by Scoop, are not supported.
- Terminal now supports pinning an instance to the top of the screen that you can summon at any time (colloquially referred to as «Quake Mode») () () () () () ()
- It is bound by default to Win+` ()
- This behavior will be granted to any window whose name is . You can use to target the quake window with commands.
- You can add a custom binding to summon any Terminal window with the action! () () () () ()
- This version of Terminal comes with Cascadia Code 2105.24, which has an italic variant.
- We’re so excited to finally show this off!
- Due to an issue, only the italic variant will display as version 2105.24.
- Terminal now supports mouse input for Windows console applications! () ()
- You can now edit key bindings for existing actions on the Actions page () and actually save them, too! () ()
- The Appearance page will now show you a (tiny) preview of the Terminal ()
- We’ve added a new treatment for visual ()
- We have added a new «Add a new profile» page to the Settings UI, where you can choose to duplicate an existing profile ()
- We’ve added support for a action (focus by index) an the subcommand ()
- When you use the «Set color scheme…» action in the command palette, we will now show you a live preview of the new color scheme ()
Part 4: Publishing your repository to GitHub
When you create a new repository, it only exists on your computer and you are the only one who can access the repository. You can publish your repository to GitHub to keep it synchronized across multiple computers and allow other people to access it. To publish your repository, push your local changes to GitHub.
-
Click Publish repository in the menu bar.
- GitHub Desktop automatically fills the «Name» and «Description» fields with the information you entered when you created the repository.
- Keep this code private lets you control who can view your project. If you leave this option unselected, other users on GitHub will be able to view your code. If you select this option, your code will not be publicly available.
- The Organization drop-down menu, if present, lets you publish your repository to a specific organization that you belong to on GitHub.
-
Click the Publish Repository button.
-
You can access the repository on GitHub.com from within GitHub Desktop. In the file menu, click Repository, then click View on GitHub. This will take you directly to the repository in your default browser.
Как заработать больше
Самый простой способ заработка это увеличить количество раздающих компьютеров.
При желании можно взять в аренду, проверенные виртуальные сервера можно арендовать на .
Рекомендую тариф VDS/VPS «MEGA» c SSD до 100Gb с операционной системой Windows. Средний срок окупаемости до недели. Для более стабильной работы торрент клиента лучше использовать Windows-Server-2012-R2-RUS.
Протестированные VPS:
Лучшие Linux сервера у
Черный список:
- (почасовая оплата, частые блокировки)
- ZetaLink (частые блокировки, но деньги возвращают)
- MaCloud (меняют условия задним числом и загоняют баланс в минус, техподдержка неадекватна)
Install Git on Linux
Fun fact: Git was originally developed to version the Linux operating system! So, it only makes sense that it is easy to configure to run on Linux.
You can install on Linux through the package management tool that comes with your distribution.
Debian/Ubuntu
- Git packages are available using .
- It’s a good idea to make sure you’re running the latest version. To do so, Navigate to your command prompt shell and run the following command to make sure everything is up-to-date: .
- To install Git, run the following command: .
- Once the command output has completed, you can verify the installation by typing: .
Fedora
- Git packages are available using .
- To install Git, navigate to your command prompt shell and run the following command: .
- Once the command output has completed, you can verify the installation by typing: .
Note: You can download the proper Git versions and read more about how to install on specific Linux systems, like installing Git on Ubuntu or Fedora, in git-scm’s documentation.
