Extension concepts and architecture
Содержание:
- Publish an extension
- Grammarly
- Decide which extensions to allow
- Step 3: Provide Availability details
- Как установить расширения Microsoft Edge
- Configure using the Windows Registry
- Установка расширений в Microsoft Edge
- Picture-in-Picture Extension
- Loom
- Reddit Enhancement Suite
- Разведчик BuiltWith Technology Profiler
- Mate Translate
- Как установить расширения Microsoft Edge
- Удаление расширений
- Install Microsoft Edge
- Расширения Microsoft Edge
- Dock the DevTools in your browser
- Грамматика
- Safari
- OneNote Web Clipper
- Лучшие варианты для Microsoft Edge
Publish an extension
Before you publish an extension it needs to be packed into a CRX (Chrome extension) file. Use the following steps as a guide to packing an extension as a CRX file.
-
In the Microsoft Edge address bar, go to edge://extensions and turn on Developer mode if it’s not already enabled.
-
Under Installed extensions, click Pack Extension to create the CRX file.
-
Use the Pack extension dialog to find the directory that has the source for the extension. Select the directory and then click Pack extension. This will create your CRX file, along with a PEM file. Save the PEM file because it’s needed for making version updates to the extension. The next screenshot shows the Pack extension dialog for locating the root directory of the extension.
Important
Store the PEM file in a safe location because it’s the key for the extension and it’s needed for future updates.
-
Drag the CRX file into your extensions window and make sure that it loads.
-
Test the extension and take note of the ID field (this is the CRX ID) and version number. You’ll need this information later. The next screenshot shows a test extension with its CRX ID.
-
Upload the the CRX file to the host and note the URL of the location it will be downloaded from. This information is needed for the XML manifest file.
-
To create a manifest XML file with the app/extension ID, download URL, and version, define the following fields:
- appid — The extension ID from step 5
- codebase — The download location for the CRX file from step 6
- version — The version of the app/extension, which should match the version specified in the manifest of the extension.
The next code snippet shows an example of an XML manifest file.
For more information, see Auto-update extensions in Microsoft Edge — Microsoft Edge Development.
-
Upload the completed XML file to a location where it can be downloaded from, noting the URL. This URL will be needed when you install the extension using a group policy. See .
Important
The hosting location for the extension doesn’t need authentication. It needs to be accessible by user devices wherever they might be used.
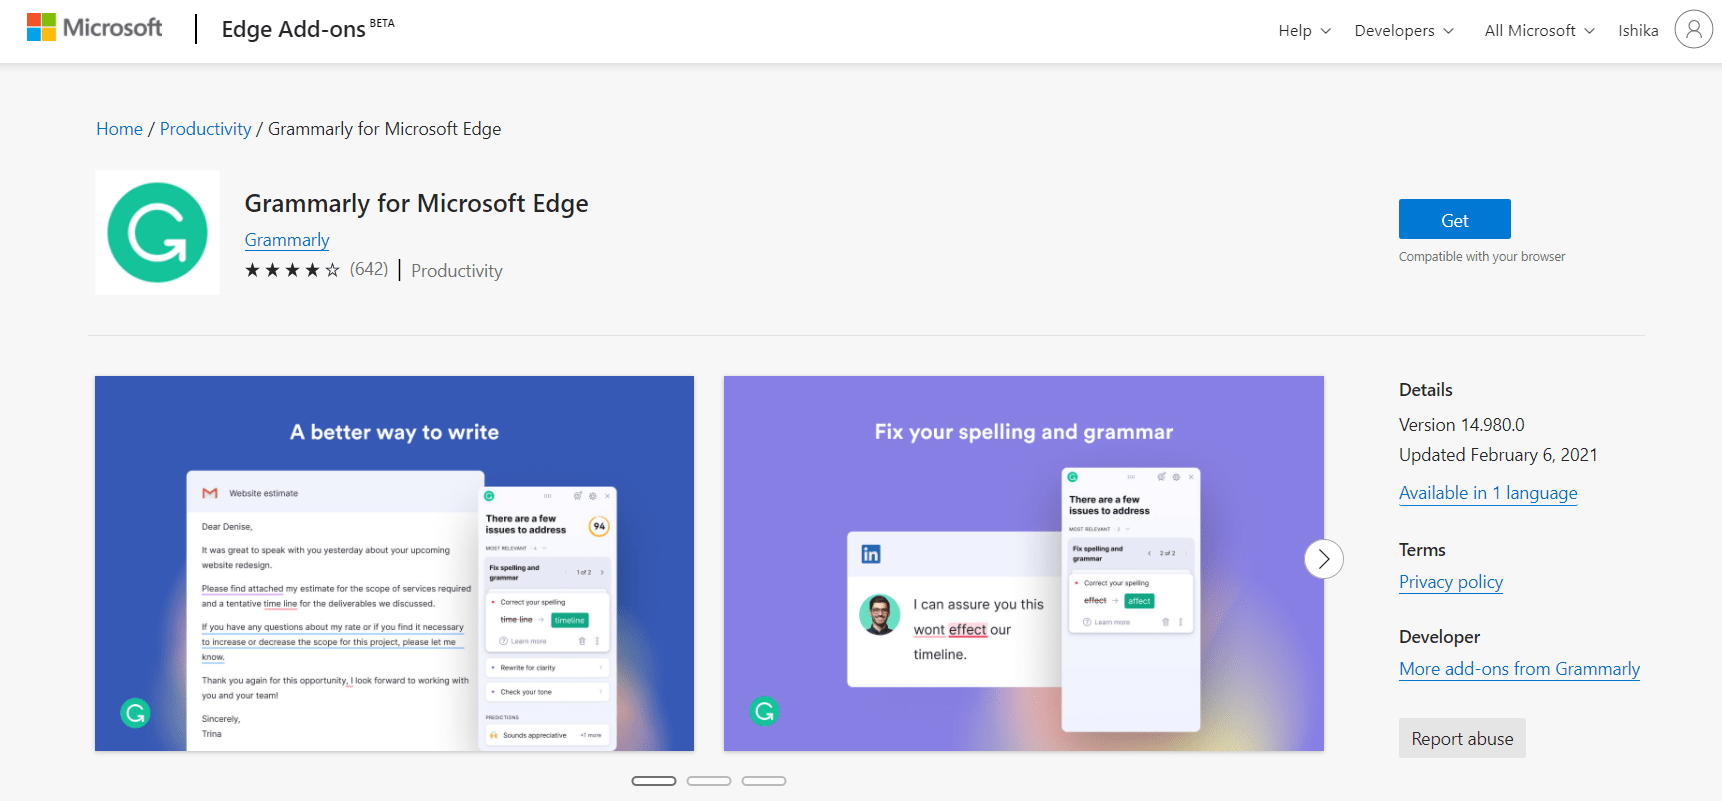
Grammarly
According to my personal experience, Grammarly is one of the best extensions for Microsoft Edge in recent times. Grammarly helps you to correct the grammatical errors of your documents and boosts your productivity.
Grammarly is the best extension for people who spend a lot of time writing on their desktops or laptops. It makes your work easier, better, and error-free. You don’t have to edit or proof-read your documents any more as Grammarly will happily do it for you.
Some of Grammarly’s exciting features are:
- The editing happens in real-time. No time is wasted in the same.
- Grammarly is highly accurate which makes editing easy.
- Grammarly takes it a step ahead by providing explanations for your mistakes.
- It is highly customizable wherein you can add your own words to the dictionary.
However, it comes with its set of demerits. The free version of Grammarly is limited and offers fewer services than that of Grammarly Premium. The free version also has a lot of advertisements that are sure to distract and annoy you.
Decide which extensions to allow
Most organizations should manage extensions by their permissions and what websites they have access to. This method is more secure, easier to manage, and is scalable for large organizations.
- Blocked/allowed permissions – Lets you control extensions by the permissions they need.
- Runtime block hosts – Lets you to control what websites these extensions can access.
Using this approach saves time because you only need to set these once. And with the run-time hosts policy, your most important sites will be protected.There are other options as well such as:
- Force install extensions – Lets you install extensions silently.
- Allowlist/blocklist (if required) – Decide what extensions are allowed to be installed.
Use the following steps as a guide to decide which extensions to allow in your organization.
-
Create a list of which extensions employees need on their computers. Test the extensions in a test environment to diagnose any compatibility issues with internal apps.
-
Choose which sites need to be more secure.
- Find out which sensitive internal websites or domains you need to block extensions from making changes to or reading data from.
- Prevent access to these sites by blocking the API calls when the extension is run. This includes blocking web requests, reading cookies, JavaScript injection, XHR, and so on.
-
Determine which permissions are required for these extensions to run. Identify which permissions pose potential risks to your users.
-
Audit the extensions your users have installed and see what permissions they need. You can look at the web app manifest JSON file in the code of the extension. Take the following steps to see what rights the extension needs:
- Install the extension from the Microsoft Edge Add-ons website or the Chrome Web Store.
- Test the extension and understand how it works in your organization.
-
Review the permissions that the extension requires by navigating to edge://extensions. For example, the Microsoft Office extension shown in the next screenshot requests the permissions «Read your browsing history» and «Display notifications». Weigh the usefulness of this extension against the level of permissions it requests. After you approve an extension for your organization, manage it using the following tools.
-
You can also validate the extensions requested by users in your organization before approving them in the organization. Some of the permissions that extensions use can be vague. For business-critical apps, you can reach out to the app developer or vendor directly to get more information about the extension or look at the source code. They should be able to detail the changes that the extension can make on devices and websites.
-
Review the Declare Permissions list, which lists all permissions an extension can use. From this list, you can decide which permissions you want to allow in your organization.
-
-
Create a master list from the data you collected.This list will include the following information:
- Required extensions. This list could be organized by department, office location, or other relevant information.
- Extension Allowlist. Required extensions with permissions that may be blocked but will be allowed to run. These extensions are needed by your users or are determined to not be a risk through conversations with the vendor.
- Extension Blocklist. Extensions that are blocked from installation. The extensions in this list have the permissions that aren’t allowed to run. Also include the core sites and domains to be kept secure and not allowed extension access. Later you can compare this blocklist to others you already have in place. You might find that you can relax your current blocklist policies.
-
Present your list to your stakeholders and the IT team to get buy in.
-
Test out the new policy in your lab or with a small pilot in your organization.
-
Roll out these new sets of policies to employees in phases. For more information, see Use group policies to manage Microsoft Edge extensions.
-
Review feedback from your users.
-
Repeat and fine-tune the process monthly, quarterly, or yearly.
With your baseline of allowed permissions enforced and sensitive corporate sites protected, you can provide your enterprise with more security while providing a better experience for users. Staff might install extensions that they couldn’t before, but not run them on sensitive business sites.
Step 3: Provide Availability details
On the Availability webpage, enter the following information about the availability of your extension.
Visibility
Select one of the following visibility options to define whether your extension is discoverable in the Microsoft Edge Add-ons website.
-
(default)
Public allows everyone to discover your extension through search, browsing in the Microsoft Edge Add-ons website, or using the listing URL to your extension in the Microsoft Edge Add-ons website. The listing URL is available on your Partner Center dashboard on the Extension Overview webpage. -
Hidden removes extensions from search results or browsing in the Microsoft Edge Add-ons website. To distribute hidden extensions in the Microsoft Edge Add-ons website, you must share the listing URL to the extension with your customers.
Note
You can change the visibility of your extension from Public to Hidden. Users who installed your extension while the visibility was set to public retain access to your extension and receive any updates you make available through the Microsoft Edge Add-ons website.
Markets
Define the specific markets in which you plan to offer your extension. The default setting for markets is all markets and that includes any future markets that are added later. To choose specific markets, select Change markets. Toggle individual markets to exclude each one, or select Unselect all and then add individual markets of your choice.
Note
You can change the markets where your extension is offered. A user who installs your extension while it is available in the user’s market retains access to your extension. However, the user does not have access to any future updates submitted to the Microsoft Edge Add-ons website.
Select Save to continue to the Properties section.
Как установить расширения Microsoft Edge
На самом деле очень просто. Ну, или почти. Здесь Microsoft поступила не совсем так, как остальные разработчики браузеров, где для расширений есть отдельная вкладка. В Edge никаких специальных вкладок нет, а есть выделенный раздел в Windows Store, то есть магазине приложений. В принципе, вполне логично, но несколько непривычно.
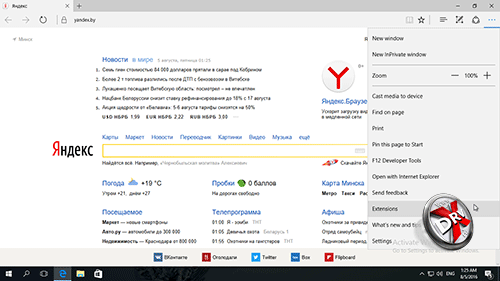
В главном меню браузера есть пункт Расширения (Extensions), который неприметно затесался в десятке других.
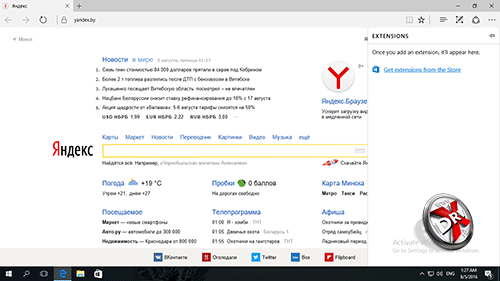
Его открытие приводит к появлению совершенно пустой панели, если не считать ссылки на магазин приложений Windows Store. Впрочем, эта панель пустует только по началу – со временем здесь должны будут появиться установленные расширения.
Ну а дальше остается только перейти к непосредственно самим расширениям.
Configure using the Windows Registry
The ExtensionSettings policy should be written to the registry under this key:
For Microsoft Edge, all settings will start under this key:
The next key that you will create is either the Extension ID for individual scope or an asterisk (*) for the Default Scope. For example, you’d use the following location for settings that apply to Google Hangouts:
For settings that apply to the Default Scope, use this location:
Different settings will require different formats, depending on whether they are a string or an array of strings. Array values require . String values can be entered as is. The following list shows which settings are arrays or strings:
- Installation_mode = String
- update_url = String
- blocked_permissions = Array of strings
- allowed_permissions = Array of Strings
- minimum_version_required = String
- runtime_blocked_hosts = Array of strings
- runtime_allowed_hosts = Array of Strings
- blocked_install_message = String
Установка расширений в Microsoft Edge
Перед тем как рассматривать лучшие дополнения для этого приложения, предстоит некоторое внимание обратить на порядок установки этих плагинов. На практике существует следующая инструкция для установки расширений для популярного браузера Edge:
- Прежде всего, вам потребуется запустить утилиту (обязательно требуется доступ к сети интернет).
- В открытой программе необходимо войти в меню (отображено в правом верхнем углу и обозначено тремя точками).
- Здесь необходимо спуститься в самый низ, после чего перейти в соответствующий раздел с расширениями.
- Пользователь автоматически перенаправляется в магазин доступных дополнений для этой программы.
- Здесь потребуется выбрать соответствующий вариант, а также установить его на свое устройство.
Следует понимать, что часть дополнительных утилит предоставляются бесплатно, но также присутствует и платный контент, который потребует от вас внесения денежных средств перед установкой.
Picture-in-Picture Extension
Do you watch or stream videos on your Microsoft Edge Browser? But what if you want to watch and browse at the same time. Generally, when you switch to the new tab from the current tab where Video is playing. It doesn’t stop the video but also you can’t see the video. Fortunately, there is some useful Picture in Picture Microsoft Edge extensions that let you watch videos and do other tasks at the same time.

Picture-in-Picture is a good Microsoft Edge extension that minimizes the video window and sticks to the browser. And when you switch to other tabs the PiP window will be there until you close it. The PiP extension works with almost all streaming services.
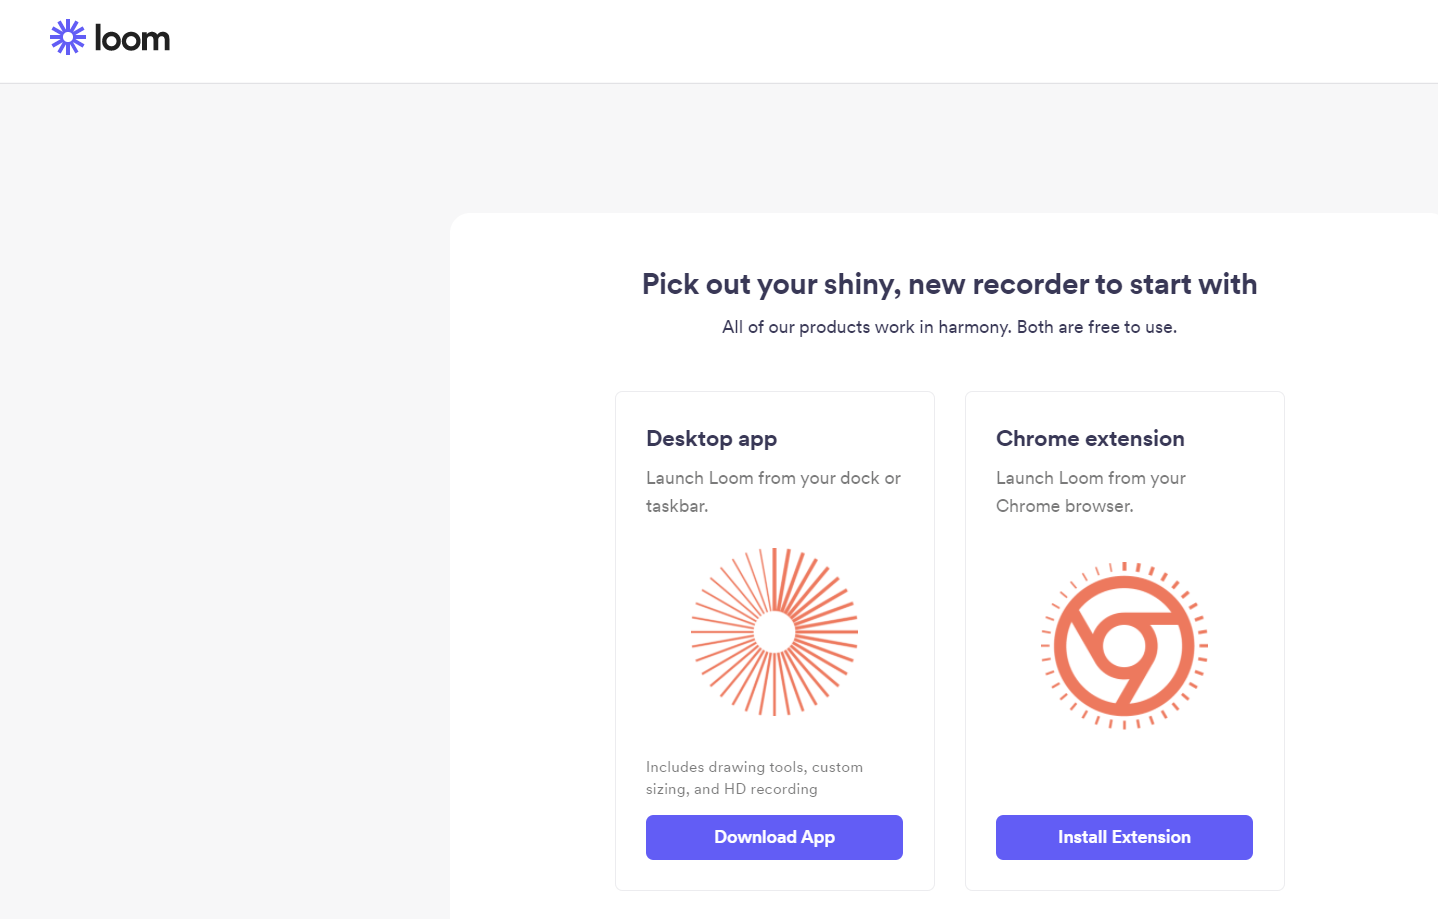
Loom
If you are looking for a way to manage your business meetings and texts better, then Loom is your solution. It enables you to record your screen and voice and share it instantly.
Loom also helps you do all this in a really short duration which helps you manage your time better without any hassle.
Some of Loom most prominent features are:
- You can record anything and everything on your screen even if it’s outside your browser.
- It is free of cost.
- You can create a workplace of your own with over 25 Creators.
- You can also edit your videos according to your convenience.
- It can be used by teachers and students for interactive learning experiences.
However, it can also have some issues that may cause the recorded video to lag. The editing is not very smooth as well and requires fixes.
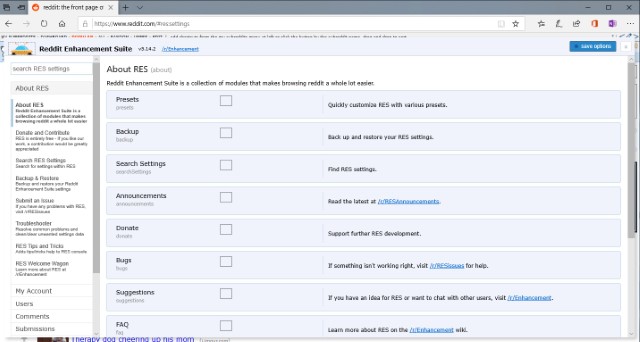
Reddit Enhancement Suite
It’s befitting that the “front page of the internet” gets an Edge extension early on, and that’s what Reddit Enhancement Suite does. This extension aims at improving your Reddit experience through features like everything on one page (they keep loading as your scroll down), so you never have to click the next-page link again. There’s a night mode for easier reading, an inline image viewer (finally) that even supports imgur links, keyboard navigation and lots more. My personal favorite is the user tagger feature, which indicates those users that you want to track or interact with frequently.
Разведчик BuiltWith Technology Profiler
А вот это уже для совсем повернутых на сетевых технологиях. BuiltWith Technology Profiler — очень интересное расширение, которое собирает максимум возможной скрытой информации о вебсайтах, которые вы посещаете. Вы можете посмотреть, на сервере какого типа располагается данный сайт, какими рекламными трекерами он оснащен, что за веб-технологии были использованы для создания этого сайта, какой у него SSL провайдер, даже какими способами для обеспечения контента он пользуется. Вся эта информация довольно симпатично и удобно собрана в выпадающей панели.
Просто установите это дополнение, кликните на него и через несколько секунд изучайте результат.
Вот пока и все наши любимые дополнения для браузера Edge. Будем надеяться, что каталог вскоре расширится, и мы сможем добавить в этот список что-нибудь новенькое.
Mate Translate
There are times when we come across a website that is in an unknown language. In such cases, the Mate Translate browser extension is here to help you.
It can translate web pages in over 103 languages. You do not have to worry anymore if you wish to try a foreign recipe that’s written in French or German.
![]()
To name a few of Mate Translate’s prominent features:
- It can translate web pages and even Netflix subtitles.
- It offers a wide range of 103 languages to translate from.
- It is not only for reading and writing several phrases but it will help you achieve full mastery over a language.
- It also offers the feature to manually type in words for their translations.
- It also teaches you how to pronounce words or phrases.
Although it offers so many amazing features at one-click, it has several bugs that are yet to be fixed. The translations can take more than the required time sometimes.
Как установить расширения Microsoft Edge
На самом деле очень просто. Ну, или почти. Здесь Microsoft поступила не совсем так, как остальные разработчики браузеров, где для расширений есть отдельная вкладка. В Edge никаких специальных вкладок нет, а есть выделенный раздел в Windows Store, то есть магазине приложений. В принципе, вполне логично, но несколько непривычно.
В главном меню браузера есть пункт Расширения (Extensions), который неприметно затесался в десятке других.
Его открытие приводит к появлению совершенно пустой панели, если не считать ссылки на магазин приложений Windows Store. Впрочем, эта панель пустует только по началу – со временем здесь должны будут появиться установленные расширения.
Ну а дальше остается только перейти к непосредственно самим расширениям.
Удаление расширений
Для того чтобы удалить дополнительный софт, предстоит проделать следующий ряд простых манипуляций:
- в обязательном порядке запускается сам браузер;
- вам потребуется зайти в меню и перейти в раздел расширений;
- здесь будет отдельное окно с уже установленными плагинами;
- необходимо выбрать программу, после чего нажать на ее удаление.
При необходимости, все дополнения также можно стереть с компьютера напрямую в системной папке.
Среди большого количества существующих браузеров, отдельный интерес вызывает Microsoft Edge, плагин, который является системным в ОС Windows 10. Эта утилита постепенно набирает популярность, так как имеет высокую скорость работы, а также позволяет сделать любые настройки. Дополнительно интерес подогревает магазин расширений, который позволяет сделать из утилиты не просто программу, а настоящий сервис с массой развлечений и полезного софта.
Install Microsoft Edge
Before we get to installing Chrome extensions on Edge, let’s first install Edge on your system:
Step 1: Head to the new Edge Insider site to download your desired build.
Step 2: Here, choose from one of the two available builds and download the installer.


Note: I’d recommend downloading the Developer build which is a bit more stable when compared to the Canary build. You can download the Canary build if you want to stay on the bleeding edge of development, but make sure you’re prepared to deal with random bugs.
Step 3: Just double-click on the package and let the installer do its thing.


A new Edge window will open up as soon as the browser is installed. Just breeze past the initial setup, choose a layout and you’re good to go.
Расширения Microsoft Edge
Итак, пока их всего 13 штук, просто пройдусь по каждому или из них без разбиения по категориям.
AdBlock для Microsoft Edge
Собственно, в представлении не нуждается – известный блокировщик рекламы AdBlock.
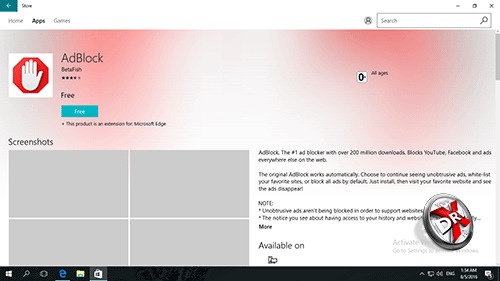
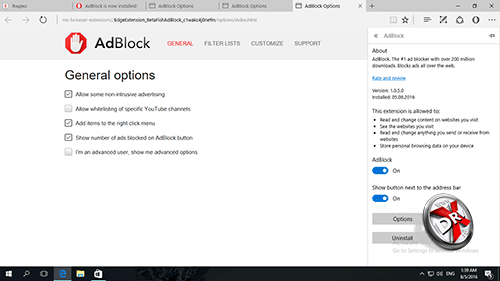
После установки он появляется в списке браузера и там можно открыть некоторые настройки, например, показывать его кнопку рядом с браузерной строкой.
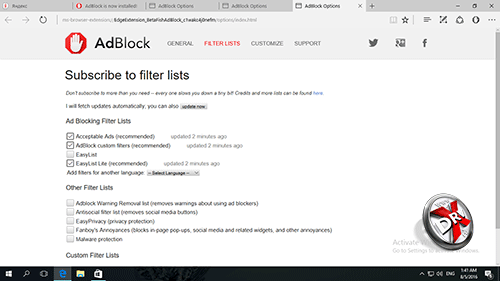
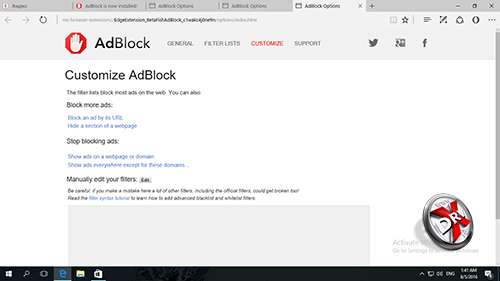
В числе остальных параметров – более тонкая регулировка рекламы, возможность создания кастомных списков сайтов и фильтров. На самом деле настроек есть порядочно.
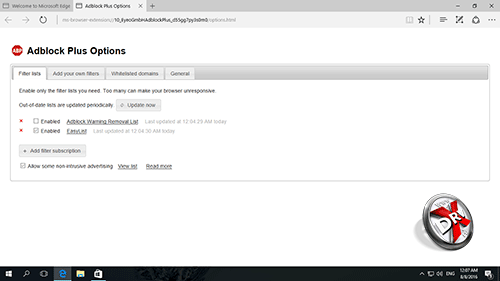
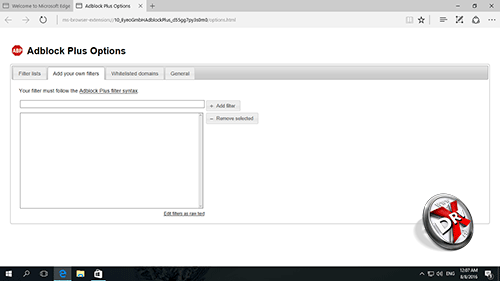
AdBlock Plus (ABP) для Microsoft Edge
Еще существует AdBlock Plus для Microsoft Edge, тот самый ABP. Это аналог предыдущего расширения и тоже очень популярен.
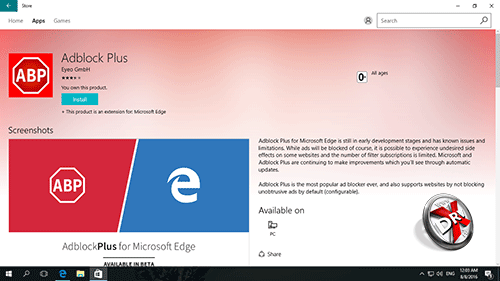
Скачивается и устанавливается оно тоже быстро.
Dock the DevTools in your browser
When you open the DevTools, it docks to the left of your browser. To change the docked location of the DevTools, complete the following actions.
- Select the Customize And Control DevTools () button.
- To the right of Placement of the DevTools relative to the page (Dock side), choose a Dock side option.
For more information, navigate to Change DevTools placement (Undock, Dock To bottom, Dock To left).
In Dock side, choose any of the following layout options.
- Undock into separate window. Helps you work with several monitors or if you need to work on a full screen app.
- Dock to left or Dock to right. Helps you keep the DevTools side by side with your web product, and is excellent when you emulate mobile devices. The Dock to left and Dock to right options work best with high-resolution displays. For more information about emulation devices, navigate to Emulate mobile devices in Microsoft Edge DevTools.
- Dock to bottom. Helps you when you do not have enough horizontal display space, or you want to debug long text in the DOM or Console.
Грамматика
По моему личному опыту, Grammarly – одно из лучших расширений для Microsoft Edge за последнее время. Grammarly поможет вам исправить грамматические ошибки в ваших документах и повысит вашу производительность.
Grammarly – лучшее расширение для людей, которые много времени пишут на своем компьютере или ноутбуке. Это делает вашу работу проще, лучше и безошибочной. Вам больше не нужно редактировать или корректировать свои документы, поскольку Grammarly с радостью сделает это за вас.

Вот некоторые интересные особенности Grammarly:
- Редактирование происходит в режиме реального времени. Не тратьте время зря.
- Грамматика очень точна, что упрощает редактирование.
- Grammarly делает шаг вперед, объясняя ваши ошибки.
- Он легко настраивается, в котором вы можете добавлять свои собственные слова в словарь.
Однако у него есть ряд недостатков. В бесплатная версия Grammarly ограничена и предлагает меньше услуг, чем Grammarly Premium. В бесплатной версии также есть много рекламы которые обязательно будут вас отвлекать и раздражать.
Safari
Поиск и установка расширений в Safari
Откройте Safari, а затем выберите Safari > Расширения Safari.
Если вы используете Safari 12, App Store откроется на странице расширений Safari.
Если вы используете более раннюю версию Safari, откроется веб-страница галереи расширений Safari.
Отключение или удаление расширений в Safari
Откройте Safari, а затем выберите Safari > Настройки > Расширения.
Для каждого расширения можно включить или отключить расширение с помощью флажка.
Если вы не можете определить, что делает расширение, или не собираетесь его использовать, нажмите кнопку Удалить для этого расширения.
Источник
OneNote Web Clipper
Если вы много изучаете в Интернете, то OneNote Web Clipper должен стать вашим расширением для браузера. Он помогает легко вырезать, редактировать и обмениваться информацией.
Вы можете использовать это расширение браузера Edge для множества целей
Хранение важной информации в Интернете обязательно сделает вашу жизнь лучше
Вот некоторые из основных функций OneNote Web Clipper:
- Он автоматически определяет тип контента, который вы хотите захватить.
- Спланируйте свою следующую поездку или запомните важные рецепты, вырезав изображения или планы в Интернете.
- Вы можете получить доступ ко всем типам контента, который вы вырезали в Интернете.
- Вы также можете выделить, настроить шрифты и многое другое, прежде чем вырезать.
Хотя он предлагает так много функций, некоторые из них могут начать отставать по прошествии значительного количества времени. В нем много ошибок, которые все еще нужно исправить.
Лучшие варианты для Microsoft Edge
В настоящее время, здесь собраны лучшие утилиты, которые существенным образом улучшают производительность главной программы. На практике, среди лучших плагинов можно выделить отдельные разделы, а именно:
- приложения для блокировки присутствующей на сайтах рекламы;
- специальные утилиты, которые обеспечивают конфиденциальность, режим инкогнито;
- версии переводчиков для работы с иностранными порталами.
Помимо представленных вариантов, здесь вы также сможете подобрать для себя различные игры, а также иной удобный софт, который существенным образом упростит процесс работы и серфинга в интернете.
Обход блокировок и конфиденциальность
В данном случае речь идет про специальные версии, которые обеспечивают полную анонимность при серфинге в сети, а также блокируют присутствующую на порталах в интернете рекламу. На практике, можно выделить следующие популярные и наиболее продуманные утилиты: AdBlock, AdGuard, Hideme VPN
Важно понимать, что конкретно VPN утилит под этот софт нет, однако, вы всегда можете установить на свой ПК или ноутбук программу, которая обеспечит полноценную анонимность

Плагины переводчики для Edge
Специально для этого браузера, был разработан онлайн-переводчик Translator for Microsoft Edge, который обеспечивает наиболее качественный перевод текстов с большинства языков мира. Для использования плагина достаточно только зайти на портал, где будет присутствовать иностранный язык, а кроме того совершить подтверждение для перевода. Впоследствии страница будет автоматически обновлена, и уже отобразится на русском языке.
Обзор других полезных плагинов
Помимо уже представленных утилит, в магазине расширений вы всегда сможете найти и другой удобный софт, который может существенным образом упростить серфинг в интернете, а кроме того некоторую иную работу. Здесь можно выделить следующее:
- Avast Online Security (для обеспечения безопасности);
- Night Eye (приложение для изменения тем);
- LastPass (специальный менеджер паролей).
Помимо перечисленных дополнений, вы здесь всегда сможете подобрать для себя нужный софт. Более того, перечень софта регулярно обновляется, что позволяет часто обновлять систему, делая ее еще удобней.
